Java Style Guide
(This style guide has been adopted and evolved from CIS 120 at the University of Pennsylvania.)
Formatting
100-character line length: Ensure that no lines of code are longer than the maximum number of characters; in the case of CSC 207, this limit is 100 characters due to Java’s inherent verbosity.
Indentation using spaces: Do not indent with tab characters (\t).
Any block of code enclosed in curly braces should be indented one level deeper than the surrounding code.
Choose a reasonable and consistent convention for indentation; generally 2 to 4 spaces is acceptable.
We recommend 4 spaces for indentation.
Make sure to configure your editor to utilize spaces for indentation instead of tabs!
Use curly braces consistently: Using “Egyptian”-style curly braces in your code in accordance with standard Java style guidelines.
/* Egyptian braces: opening brace on same line, closing brace on own line */
if (a == b) {
    System.out.println("these are Egyptian braces");
} else {
    System.out.println("hello, world!");
}
Curly braces around blocks: Though Java permits the elision of curly braces in cases where the body if-statement or loop consists of a single statement, we require that every block (no matter the number of statements) be enclosed inside curly braces on a new line. It is far too easy to make programming errors of this form otherwise:
// NO
while (x < 5)
    System.out.println("Inside block");
    System.out.println("BUG -- Not inside block!");
One statement per line: There should be no more than one statement (declaration, assignment, or function call) on any line of your program.
Use vertical whitespace to separate chunks of code: Within a block of code, use vertical whitespace (blank lines) to separate groups of statements. This makes code more readable and clarifies which statements are logically related. Note that if you have to resort to this rule, you should consider breaking your code up into multiple functions instead.
Always put spaces around operators: Every Java operator should have spaces around it (except the dot operator, e.g. method calls c.foo()).
Use parentheses to communicate precedence.
For example: 5 - (x + 4) * 8
Naming
Naming variables and methods: Use lowerCamelCase for variable and method names.
Single-word variables should be all lowercase; subsequent words should be joined with their first character capitalized.
These identifiers should not contain underscores.
Naming classes: Use UpperCamelCase for class names and enum type names.
Do not capitalize acronyms within camelCased names; the string "TCP socket ID" should be written TcpSocketId rather than TCPSocketID.
Naming constant and enum values: Values that are constants, including final static variables and enum values, should follow CAPITAL_CASE conventions, in which all-caps words are separated by underscore characters.
More descriptive names for larger scopes: Variables that have greater scope should have more descriptive names.
It is often preferred to use a short name like i or j for a loop index, but as the scope of an identifier increases, so should the meaningfulness of its name.
For example, prefer leftChild over l for a class field.
Commenting
Do not over-comment code: If the function a piece of code is reasonably obvious to experienced Java programmers, then it likely does not need to be commented. Be judicious; if you are unsure, it is often best not to include a redundant comment. If you feel like it is necessary to extensively comment your code, consider how to rewrite it to make it more straightforward.
Comments should describe purpose over implementation: The code itself is a description of an implementation, so it is unnecessary to comment what the code is doing (e.g., x++ does not need a comment like “Increment x”).
Instead, describe at a high level the intended use of the piece of code, such as what task the function performs.
Write Javadoc comments: Above all public methods and non-trivial private methods, you should include a block comment with the Javadoc syntax /** … */.
This should describe the function’s intended use, as well as information about the function’s parameters, return value, and exceptions it throws (if any).
At a bare minimum, your Javadoc comments should contain @param tags for each method parameter and a @return tag for the return type, if applicable.
Do not submit commented-out code: Remove any dead or commented-out code from your source files before submission. Use git to save snapshots of code!
Verbosity
Use a helper variables or methods to avoid computing values multiple times: If you find that a particular sequence of computations is being repeated more than twice, you should assign it to a variable and/or abstract it into a helper function which returns the desired value.
Avoid redundant or verbose expressions: Write expressions such as if conditions, while loop guards, and the like in the most succinct and expressive way possible.
Especially consider whether a long expression involving multiple || or && operators is easily readable and whether it could be written with fewer or simpler sub-expressions.
Prefer Java idioms over more verbose alternatives: There are often many ways to write the same code in Java; make use of language features and idioms that make code more compact and easier to understand at a glance.
For example, consider the following loop, which prints the contents of the list l:
List<String> l = /* ... */
for (int i = 0; i < l.size(); i++) {
    System.out.println(l.get(i));
}
Contrast this with a more idiomatic version that uses the for-each construct:
List<String> l = /* ... */
for (String s : l) {
    System.out.println(s);
}
The second version has less syntactic clutter, and its intent is much more obvious to the reader of the code.
(It is also much faster if l is a LinkedList!)
Make use of library functions when possible: Java has quite a rich standard library, so you should make use provided functions instead of re-implementing them (unless otherwise directed). Your own implementation will almost always be less efficient, and is less likely to be correct.
Organization
Packaging: Java source files should be logically grouped according to standard package-naming conventions.
In particular, for our work, we will use the following reverse domain name edu.grinnell.csc207.<project-name> as the start of all our packages.
For example, if our project was called myproject, all files should be declared under the edu.grinnell.csc207.myproject package.
Ordering of class methods and values: Classes should be organized internally according to this order:
- Import statements,
- Fields,
- Constructors, and
- Methods
Methods and classes should perform one specific and unique task: Avoid creating a single method or class that “knows too much”; that is, a method or class which serves multiple disjoint purposes or is responsible for too much. Such implementations are often unwieldy and difficult to extend or debug. This is known as the principle of separation of concerns—each class and method should be responsible for one thing and one thing only. Your program should be composed of a group of such classes which cooperate to achieve a goal.
Use extension only to represent “is-a” relationships: If you create a subclass, make sure that the subtype A “is a” version or variant of the supertype B.
If it is more appropriately described as a “has-a” relationship, then consider making B a field of A instead.
Data Structures
Consider using Sets to represent unordered data: The abstract type Set is a good (though not always the best) candidate for representing data that does not require any particular ordering.
Sets also provide efficient verification of object membership.
Example implementation in Java: TreeSet.
Consider using Lists to represent ordered data: The abstract type List is a good (though not always the best) candidate for representing data with an imposed or sorted ordering.
Lists generally provide efficient insertion of elements at their endpoints.
Example implementation in Java: ArrayList.
Consider using Maps to represent associations between data types: The abstract type Map is a good (though not always the best) candidate for representing one-to-one associations or relationships between two objects.
Maps, like Sets, provide efficient verification of object membership, as well as efficient value lookup for a given key.
Static types should be interfaces: The declared static type of any collection should be a Java interface rather than an implementation of that interface. For example:
Map<String, Integer> ids = new TreeMap<>(); // Map, not TreeMap
List<Point> points = new LinkedList<>();    // List, not LinkedList
JUnit Testing
Tests expecting exceptions: If you are writing a test case that is expected to throw an exception, you should add an expected value to the @Test annotation.
For example, if we expect the body of our test function to throw a IllegalArgumentException, we would write @Test(expected=IllegalArgumentException.class) above the function.
It will fail if it does not raise an instance of this particular exception.
Do not use try-catch statements in place of the expected parameter.
Use assertEquals(a,b) over assertTrue(a.equals(b)): JUnit provides comparison assertions (which implicitly call objects’ equals methods), but provide more useful failure information than assertTrue.
Test floating-point values with a threshold: Do not use JUnit’s default assertEquals(double expected, double actual) method, as it is deprecated.
Instead, use assertEquals(double expected, double actual, double epsilon), which allows for some wiggle room (an epsilon value) to account for the imprecision of floating-point values.
An epsilon value of 0.0001 usually suffices for most purposes.
Barcodes
Universal Product Codes (UPC) are used worldwide to uniquely identify products sold in stores. The basic UPC is a 12-digit number (the UPC-A standard), but you are likely more familiar with UPCs in their barcode format. Barcodes are a 1-dimensional image representing a piece of data, here the 12-digit UPC code. Barcodes are easily scannable by a computer, alleviating the need for manual, error-prone data entry.
An example of a UPC and its corresponding barcode can be found below:

(By toguro - Own work, CC0, https://commons.wikimedia.org/w/index.php?curid=67365482)
Each digit of the UPC-A is represented by a collection of bars rendered sequentially in the barcode. There is a unique sequence of bars for each possible digit, leading to a simple, linear method for producing a barcode from a UPC-A number.
In this project, we’ll write a UPC-A barcode creator that takes a code as input, checks whether the code is a valid UPC-A number, and if so, prints the code in barcode form to the console.
UPC-A Validation
A string is a valid UPC-A number if it obeys the following properties:
- The string is exactly 12 characters.
- Each character of the string is a digit, i.e.,
'0'–'9'.
Implement this logic in the static isValidCode(String code) method of the Barcodes class.
The following String methods from the standard library will be useful for this task:
s.length()returns the length of strings.s.charAt(i)returns the character located at indexiof strings.
Furthermore, the static method Character.isDigit(ch) is useful to test whether character ch is a digit.
Finally, curiously, there is no single method to convert a char to a digit!
To do this, we must employ our knowledge of character values.
Recall that:
- Every character is really stored as a natural number, its associated character value.
- The base-10 digit characters,
'0'–'9', have sequential character values. - Addition
kto a characterchproduces the character whose value iskaway fromch. Dually, subtraction works in the other direction.
We can put these facts to convert characters to digits by writing an expression that, when given a character-digit, produces the corresponding digit.
You will use this functionality in several places in your program, so it is worthwhile to make a helper function, e.g., toDigit(char ch), to do this work.
Check digit computation
In addition to formatting, UPC-A numbers also employ a check digit to quickly verify whether a digit has been entered correctly. It turns out that only the first eleven of the twelve digits carry meaning! The twelfth digit is computed as a function of the first eleven digits. Thus, we can detect whether a UPC-A number is valid by computing the expected check digit from the first eleven digits and see if this expected value matches the actual check digit, i.e., the twelfth.
Let be the 12 digits of the code. The formula for the expected check-digit can be expressed as follows:
In other words:
- We sum up the first, third, etc., digits and multiply the result by three.
- We sum up the remaining digits.
- We add the two results together and take that result, modulo 10.
Remember that is the remainder of the division .
The corresponding mod operator in Java is %.
If , then the check digit is . Otherwise, the check digit is .
Implement this computation in the static method Barcode.computeCheckDigit(code), which returns the expected check digit of the given code.
The method assumes that code is a valid code as verified by Barcode.isValidCode(code).
Barcode Rendering
With a valid UPC-A barcode in-hand, we can now render it to the screen. We’ll render the barcodes by printing individual squares to the console, called modules in the barcode world.
Printing Modules
The character we’ll print is the Unicode square block:
█
Each module will be colored either black or white.
To color each block, we’ll take advantage of ANSI color codes, extended escape sequences that the terminal interprets as color/formatting commands.
The format of an ANSI escape code is: \033[<code>m where <code> is a number denoting the desired color or formatting.
Note
What is going on with that escape code sequence? Really,
\0is a Java-level escape code that allows us to enter a character value in octal, i.e., base-8. The character value we provide is octal33, which is decimal27. The character with this value is theESCcharacter. Thus, to enter ANSI color code “mode,” the terminal must first see the character sequence:ESC,[. Once we’re in this mode, we provide a numeric code and exit the mode withm.
The codes that we will need are:
- Black text:
30. - White text:
37. - Reset:
0.
This last code is important because the escape codes are stateful in the sense that once you instruct the terminal to, e.g., write in blue, it will write all subsequent text as blue. We use the reset code to return the terminal back to its original writing state.
With this in mind, to write a black or white square to the terminal, we would use the following strings:
- Black:
"\033[30m█\033[0m" - White:
"\033[37m█\033[0m"
Which change the terminal color to black or white, prints a square, and then resets the formatting. I recommend writing helper functions that print single colored squares to the console!
Barcode Formats
A valid UPC-A barcode is 113 modules, i.e., squares, wide, consisting of the following sections.
In our description of these sections, we’ll use B to denote a single black module/square and W for a white module/square.
- A quiet zone consisting of 9 white modules, i.e.,
WWWWWWWWW. - A start zone of the form
BWB. - The first six digits of the UPC-A number, the left side of the number.
- A middle zone of the form
WBWBW. - The last six digits of the UPC-a number, the right side of the number.
- An end zone of the same form as the start zone,
BWB. - A quiet zone similar to the first,
WWWWWWWWW.
The UPC-A format defines a seven module pattern for each possible digit, defined below:
0: WWW BB W B
1: WW BB WW B
2: WW B WW BB
3: W BBBB W B
4: W B WWW BB
5: W BB WWW B
6: W B W BBBB
7: W BBB W BB
8: W BB W BBB
9: WWW B W BB
The spaces in the table do not appear in the output. They are present to help make clear the transition between black and white modules.
When printing the first six numbers of the code (the left side of the barcode), we use the format above.
When printing the last six numbers (the right side), we invert the colors.
For example, the module pattern for 0 is WWWBBWB on the left side and BBBWWBW on the right side!
Use this information to implement the key static function, Barcode.printBarcodeRow(String code), which prints a line to the console consisting of one row of the barcode for given UPC-A code.
The function assumes that code is a valid UPC-A code (as determined by the verification functions you wrote above).
Keeping in mind good program decomposition principles, the structure of printBarcodeRow should directly reflect, via calls to appropriately-named helper functions, the format of a barcode.
Additionally, rather than hard-coding these module patterns within printBarcodeRow, we’ll use a basic data structure to store the patterns in such a way that allows us to easily lookup the module patterns for a given digit and programmatically iterate over the pattern so we can generate bars from it.
Our choice of data structure will be an array-of-arrays called ENCODINGS in the Barcode class.
The first level of arrays corresponds to each digit, e.g., index 0 corresponds to digit 0.
The second level of arrays is the module pattern for that digit as a collection of integers.
These integers represent the widths of each collection of alternating white-black modules for that digit.
For example, the sub-array for digit 0 should be { 3, 2, 1, 1 } corresponding to its WWW BB W B pattern described above.
Fill in the ENCODINGS array with this data taken from the table above and use it to power your definition of printBarcodeRow.
Note that you can use nested array literal notation, e.g.,
int[][] arrs = {
    { 1, 2, 3 },
    { 4, 5 },
    { 6, 7, 8, 9 }
};
To concisely specify the ENCODINGS array.
Once completed, you should find this data-driven approach to solving the problem to be much more elegant than hard-coding the patterns as a collection of conditionals!
This will be a recurring theme in the course as we explore our fundamental data structures!
The Barcode Program
The overall Barcode program puts together these components to verify and print a UPC-A barcode to the screen. The Barcode program takes exactly two command-line arguments as input:
- The UPC-A code as described above.
- The height of the barcode to print to the screen. The height is a positive integer denoting the number of rows to be printed.
When executing the program via Maven, pass the -Dexec.args flag to mvn exec:java to specify these arguments.
To specify multiple command-line arguments to the -Dexec.args flag, you’ll need to enclose the entire flag in quotes.
For example, here is a sample invocation of the program with the UPC-A number 036000291452 and height 5.
mvn compile exec:java -q "-Dexec.args=036000291452 5"

A fun way to verify that your image is correct is to use your phone’s camera app or a desktop-based barcode scanning app. With enough rows, your app should be able to read the barcode and report back the UPC-A number that you used!
When testing your app, you should try out other UPC-A numbers. You can find these on many trade products, e.g., books or food labels. Note that our program only works for UPC-A numbers and that these products frequently have multiple codes on them. UPC-A numbers are always 12 digits and their barcodes usually look like the example provided at the top of this write-up.
In addition to this positive behavior, your barcode program should also perform appropriate error checking on the inputs.
It should cover each of the following cases and output the given error message before exiting.
To exit with an error, you can use the static System.exit(errCode) method, passing a non-zero errCode value, e.g., 1.
- The user does not provide exactly two command-line arguments:
Usage: barcode <UPC-A code> <height>. - The user provides a code that is not a string of 12 digits:
Code must be a string of 12 digits.. - The user provides a height that is not a positive integer:
Height must be a positive integer.. - The user provides a code whose check digit is inconsistent:
Expected check digit X but found Y.whereXis the expected check digit andYis the actual check digit found in the provided code.
Here are example invocations of the program and the expected output in these erroneous cases:
➜ mvn compile exec:java -q "-Dexec.args=20"
Usage: barcode <upc-a code> <height>
➜ mvn compile exec:java -q "-Dexec.args=1234567 20"
Code must be a string of 12 digits.
➜ mvn compile exec:java -q "-Dexec.args=036000291452 -10"
Height must be a positive integer.
➜ mvn compile exec:java -q "-Dexec.args=036000291450 20"
Expected check digit 2 but found 0.
Turning in Your Work
To turn in your lab/project work for this week, first make sure that all your code has been committed to your Git repository and pushed to Github. When you click on the source control tab in the left-hand sidebar of Visual Studio Code, the tab should report that no files have been changed and no changes need to be pushed/synced with main.
Once you have done this, you can navigate to the appropriate entry on Gradescope and upload your work. When uploading your project, you must select the option to upload it via Github. If you choose another method, then the directory structure of your project will be either inconsistent with what our grading infrastructure expects or deleted entirely from the submission.
Note that the Gradescope submission page features an autograding script that runs on every submission. Check the autograder results to ensure that your submission meets basic correctness tests. Note that not all aspects of your submission will be checked via the autograder, but we will try to check as much as possible, so you can receive quick feedback on your work!
Java Exploration
In the spirit of one of the meta-learning goals of the course, we’ll use these first weeks not just to learn the Java programming language but also the refine our skills at learning new programming languages. The jump from C to Java is no where near as dramatic as the jump from Racket to C, so we can use this opportunity to develop some best practices for migrating from language to language whether it’s from Java to C#, Java to Python, or to some more exotic language.
Partners, Collaboration, and Turn-ins
For our weekly labs, you will work with a randomly-assigned partner. We’ll mix the partners every week to keep things fresh. Please make sure you understand the collaboration policies for the course as presented in the syllabus. And finally, whenever you do work with your partner, keep in mind the golden rule when working with a group:
You are there to help your partner learn and vice versa!
Github Repositories
At this point, you should have your development environment set up for the course: Java, VSCode, Maven, and Git. We will use Github to manage our project work for the course. To get started, go to the template repository on Github for this week’s labs/project:
Choose the option to “Use this template” and “Create a new repository” to create a copy of the template in your account.
From here, give your groupmates access to this new repository. Navigate to the repository on Github, click “Settings” → “Collaborators” in the sidebar and add your partner’s via their Github usernames to the repository.
Finally, you will need to clone down the repository to your local machine so you can do work on it. Navigate back to your repository’s main page. (Make sure this is your copy’s page and not the template’s!) Click on “Code” → “Local” → “SSH” and copy the SSH location. From the terminal, issue the following command in the directory where you want to put your project’s folder:
$> git clone <SSH location>
If everything is set up correctly, this command should clone down your repository to your machine. From there, you can open up the folder in VSCode and begin to work!
Part 1: Building Up Your Bag of Programs
With a basic programming pipeline established, you are now in the position to begin writing real programs. I typically break down what I can do in a programming language into two buckets:
- What I can do with the language itself.
- What I can do with the language’s libraries.
For solving more interesting problems, we’ll need external libraries (either the built-in libraries or some third-party libraries), for example, to perform file I/O or create graphics. But it is worthwhile to tackle the two buckets independently. In particular, learning what primitive operations the language provides gives you insight into how you should model your problems and structure your solutions.
Again, Java is an ancestor of C, so much of these primitive operations are carried over without any changes. In particular, minus some slightly different syntax and subtly different semantics (which will be exposed as we write more Java):
- Basic types,
- Variable declarations and assignments,
- Basic expressions and statements, and
- Function declarations.
Are identical between Java and C.
With this in mind, try writing a program that solves the canonical Fizzbuzz interview problem:
In Fizzbuzz.java (found in the edu.grinnell.csc207.exploration package), write a complete program that takes a single command-line argument n, presumed to be an integer, and prints the integers from 1 to n (inclusive) to the console, one integer per line.
However:
- When
nis a multiple of 3, printfizz, - When
nis a multiple of 5, printbuzz, and - When
nis both a multiple of 3 and 5, printfizzbuzz.
> java Fizzbuzz 5
1
2
fizz
4
buzz
Your program does not need to perform any error-checking on the command-line arguments, i.e., it can assume it receives exactly one argument that is an integer.
To convert a String to an int, use the Integer.parseInt(n) function.
When executing this program via Maven (mvn exec:java), you’ll need to specify the fully-qualified name of the Fizzbuzz class explicitly: edu.grinnell.csc207.exploration.FizzBuzz with the -Dexec.mainClass flag.
Additionally, you will also need to use the -Dexec.args flag to specify Fizzbuzz’s command-line argument.
Putting the two together, the following Maven invocation compiles and runs the program with 20 as the command-line argument:
mvn compile exec:java -q "-Dexec.mainClass=edu.grinnell.csc207.exploration.FizzBuzz" "-Dexec.args=20"
(Remember you can use up-arrow and down-arrow in the terminal to scroll through your command history! This will help you avoid having to type out this command over and over again!)
The fizzbuzz problem is an example of one of the standard programs I try to write down whenever I learn a new language.
It’s ideal for this purpose because it:
- Is a short program to write, yet is complex enough to be non-trivial.
- Tests the language’s expressiveness. In other words, how do I express repetitive and conditional behavior?
Committing and Pushing Your Changes
When you reach stopping points in development, you should commit and push your changes to Github to save your work. YOu can do this through the Git menu in the left-hand sidebar of VSCode!
Part 2: The String Class
In this part, we use the String as our vehicle for exploring what an object can provide us as a client as well as get practice using the behavior of objects to solve problems.
The Standard Library Documentation
Rather than summarize the set of behavior that String objects expose, we’ll use this opportunity to explore the Java standard library. The standard library is built-in to Java; it contains a ton of classes for you to use that cover your basic needs as a programmer: containers, graphical interfaces, networking, and parsing among others. You can find the standard library documentation for Java 23 below:
(Technically, this is the link to the java.base module page which contains the standard library packages.)
In my humble opinion, the Java standard library documentation is the best organized API document out there, and is a large reason why Java is so popular. On this page, you’ll see the following things:
-
The main page, which features a description of every package available in the Java standard library. Whereas a Java source file (roughly) corresponds to a single Java class, a package corresponds to a folder in the file system. For example, the
java.utilpackage corresponds to the folderjava/utilin the standard library’s source tree. Thus, packages are a way of organizing collections of classes into logical units. -
The sidebar, which features an abbreviated list of all the packages as well as all the classes in those packages.
In the “All Classes” list, find the String class and click through to see its documentation.
All the pages of the Java documentation are organized as follows:
- An overview of the class, in particular its purposes and how to use it.
- A summary of the fields, constructors, and methods of that class. Recall that the fields and methods correspond to the state and behavior of objects of this class. The constructors correspond to how we construct objects of this class.
- Detailed descriptions of the fields, constructors, and methods.
Feel free to skim through the API page; there’s a lot of stuff here!
Lab Write-up
For this part, you’ll write code in the StringExploration.java file found in the project.
Additionally, you will write your answers in the first two subparts in the README.md file found at the root of the project.
you will write your aMarkdown file file called README.md.
This file is a Markdown file,a simple, text-based, markup language that is common when writing programming documentation.
Part 2.1: Old Hat, New Hat
You have already worked with string datatypes in other languages. Keeping in mind our theme of “mapping old knowledge to new setting,” let’s brainstorm what we could do with strings in Scheme and C and either find equivalents in the Java standard library or note that these are things we must implement ourselves.
- With your partner, brainstorm a list of (a) useful functions over strings you’ve used in other languages and (b) operations, i.e., common programming patterns, over strings.
- For each entry in your list, peruse the String class documentation and try to find an equivalent String method that performs the function/operation in question. If you can’t find such a method, write a code snippet that performs the same effect.
Part 2.2: Iceberg, Right Ahead!
One of the operations you may have identified that you want to perform over strings is equality. Equality is trickier than it seems and requires some in-depth discussion. Sometimes, seemingly simple operations hide language complexity, some of which your prior experience may account for and others, you just need to be ready to learn something new!
When you are done with section, please check your answers with a member of the course staff!
-
First, does the standard equality operator work over strings, (
==)? Try running the following code snippets (either in yourmainfunction or in JShell) and see if they work as you expect:String s1 = "hello world!"; String s2 = "hello world!"; System.out.println(s1 == s2); // A String s3 = s1.substring(0, 5); String s4 = s2.substring(0, 5); System.out.println(s3 == s4); // B String s5 = new String(new char[] { 'h', 'e', 'l', 'l', 'o', ' ', 'w', 'o', 'r', 'l', 'd', '!' }); System.out.println(s1 == s5); // C -
You may have noticed that there is an
equals(obj)method of the string class! Try replacing all the uses of==with appropriate invocations of theequalsmethod (does it matter which of the two strings you callequalson?). Do you obtain the results that you were expecting now? Based on your results, complete the following sentence:To compare two strings for equality, we must …
-
But why is this the case? Let’s focus first on the equality checks marked
BandCabove. I’ll appeal to your knowledge of C and state a subtlety about Java values not apparent until now:Values of object type (of which
Stringis one) are actually pointers (or more specifically, references) to those values in memory.With this in mind, in a sentence or two, explain why
==does not work for theBandCstring examples listed above. -
Now, let’s revisit the equality check marked
A. You might observe that your answer to the previous part doesn’t account for the results in this case. It turns out that Java does something special that our previous languages do not do!Search the String class documentation for the
intern()method and read about it. Based on this, can you explain the results of this equality check?
Part 3: A Trio of Problems
With this documentation in hand, tackle these three programming problems. You are free to use any of the methods of the String class as you see fit.
Problem 1: Intersperse
Write a function, intersperse(arr), that produces a string that is the result of interspersing a comma among all the strings found in the given array.
For example, if you pass the array { "ab", "cd", "ef" } to intersperse, you should receive the string "ab,cd,ef".
(Hint: there is a concat method of the string class.
However, the plus (+) operator also performs concatenation between strings in Java!)
Problem 2: Comma-separated Value Parsing
Write a function parseName(String s) that parses a full name from s and returns it in the order of: <first name> <middle name> <last name>.
You should assume that the string s is in the following format:
<last name>,<first name>,<middle name>
For example, parseName("Turing,Alan,Mathison") should produce the result Alan Mathison Turing.
You may assume that commas do not appear in the given name.
Problem 3: Forgiving Prompt
For this problem, we’ll use a new class, the Scanner to get input from the user.
Scanner objects provide the same functionality as the C scanf or readline functions, but are much easier to use!
Here is an example of using a Scanner attached to System.in, i.e., standard input:
// This `import` statement is necessary to make the Scanner class visible
// since it is not in the `java.lang` package.
import java.util.Scanner;

public static String fetchString() {
    Scanner scanner = new Scanner(System.in);
    // the nextLine() method returns the next line from the stream
    // that is used to construct the scanner.
    return scanner.nextLine();
}
With this in mind, write a function, forgivingPrompt(question), that prompts the user to answer yes or no to given question (specified as String).
The function returns true if the user answers positively and false if the user answers negatively.
The prompt is “forgiving” in that it accepts a variety of answers:
- Y, Yes, Yep
- N, No, Nope, and
- Any lower-case or upper-case variants of these.
If the user does not enter in one of these responses, the function prompts the user again. The function will prompt the user repeatedly until one of these responses is given.
Speed Reader
(This project originally appeared as a SIGCSE 2025 Nifty Assignment by Peter-Michael Osera!)
Everyone has wished they could read faster at some point in their life, for example, to get through the required reading for their English class, to cram for an exam, or to simply get through their ever-growing list of novels to read. Since the 1950s, psychologists, linguists, and educators have devoted significant efforts into speed reading techniques that can dramatically increase your reading speed with relatively little loss of comprehension. In this homework, we will prototype one approach to speed reading called Rapid Serial Visual Presentation (RSVP)—recently popularized by Spritz Inc. and apps like Outread (iOS) and Reedy (Android)—and run some small user studies to test its effectiveness.
Background
Many modern speed reading techniques are based on the insights of school teacher Evelyn Wood. In the 1950s, Wood observed that, among other things, (1) using your finger or some other pointing device to train your eyes and focus while reading and (2) eliminating subvocalization, internally speaking words while reading them, can dramatically increase your reading speed.
Since then, countless speed reading courses have been developed to help students develop these skills. However, these courses rely on the student’s discipline to develop good reading habits, and it is easy for an untrained student to learn “the wrong way” and thus never seen the purported benefits of speed reading. Computer programs in this context can act a tutor or personal support system, ensuring that students practice the right skills even while learning alone.
RSVP, in essence, takes these ideas of pointing-while-reading and removing sub-vocalization to their limit. With RSVP, a series of objects—here, words—are presented quickly in succession. By design, the reader is only able to focus on a single word at a time. And furthermore, the words appear at such a speed that the reader is unable to sub-vocalize like normal. Such a presentation style is only really practical with a computer program!
Here are some examples of RSVP:
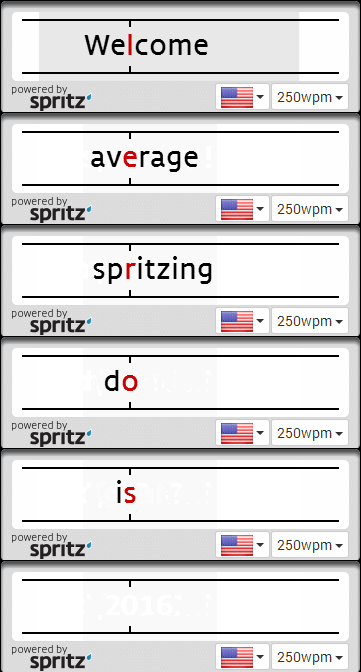
Note that while somewhat disorientating at first, the text becomes readable with a little bit of practice, especially once you consciously try to stop yourself from subvocalizing each word. This text is being presented at 250 words per minute. Here are examples of the technique used to read 350 and 500 words per minute, respectively.
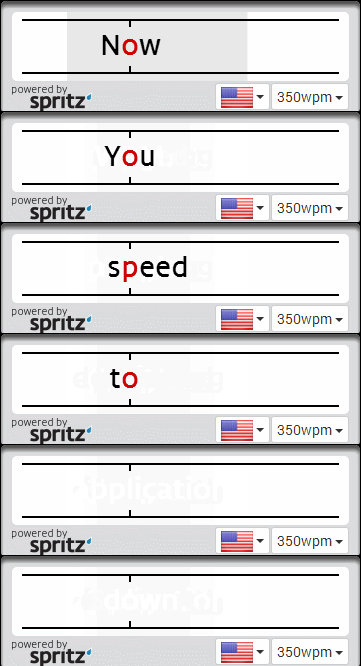
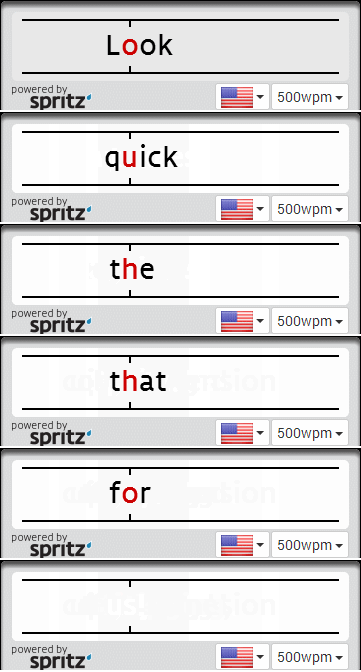
Note that the average reading speed is approximately 250-300 words per minute for reading adult prose. So with some practice, you can use a speed reader to read at approximately 2x the average reading rate. In contrast the world record for speed reading is a blistering 4251 words per minute!.
Project Setup
You’ll build your speed reader in the edu.grinnell.csc207.speedreader package found in the lab’s project repository:
Make sure that you update the README.md Markdown file in the root of the project folder with the following information:
- The name of this project.
- Your name.
- A one sentence description of the content of this submission.
- A list of the resources you used—organic or inorganic—to complete this assignment and how they helped you complete the assignment, one sentence per such resource. Remember to include all resources, including course materials, editors, peers, and online resources!
In the final part of this project, you will add details of your user study in your README.md, too!
Part 1: WordGenerator
We can break up the functionality of the Speed Reader into three components: reading text from a file, rendering that text to the screen, and animating that rendering process.
First, we’ll build a class, WordGenerator, that reads in text from a text file and logs stats about the text that is read.
The simplest way to read in files in Java is through the Scanner class.
In general, a Scanner breaks up a stream of text into words or tokens that can be read from the Scanner.
We can attach a Scanner to a variety of text sources; most commonly, we’ll attach the Scanner to File objects that represent files on disk.
Here is an example usage of a Scanner where we read in files from a text file and print them to the console, one word per line:
import java.util.Scanner;
import java.io.File;
import java.io.IOException;

// ...

public void printWords(String filename) throws IOException {
    Scanner text = new Scanner(new File(filename));
    while (text.hasNext()) {
        System.out.println(text.next());
    }
}
Things to note about using a Scanner:
- The classes we must use:
Scanner,File, andIOExceptionexist in the standard libraries but appear in different packages. To use these classes without having to specify the fully-qualified name of the class (package + class name), we useimportdeclarations to tell Java that, e.g, when we referenceScanner, we really meanjava.util.Scanner. Note thatimportdeclarations appear at the top of Java source files outside of any class definitions. - To instantiate a
Scanner, we pass in aFileobject. It is tempting to pass in the filename directly, but this is a mistake because the resultingScannerwill parse the filename string rather the file it denotes! - The critical methods of
ScannerarehasNext()to see if theScannerhas text left andnext()to get the next token out of it. See the API documentation linked above for more information on these methods. - Note that our function signature has a
throws IOExceptionclause following the argument list (but before the opening curly brace). This throws clause is necessary because the creation of theScannerobject may generate a checked exception, namely anIOException. Exceptions can be handled using try-catch blocks or they be explicitly passed on to calling functions using the throws clause. For now, using the throws clause is easier as we don’t have much to do if such an exception occurs; we’ll talk about handling exceptions in Java in the coming weeks.
Our WordGenerator will act as a wrapper around this functionality of the Scanner.
Your WordGenerator class needs to have the following constructor and methods:
WordGenerator(String filename): constructs a new generator that processes text from the given file.boolean hasNext(): returnstrueiff the underlyingScannerof thisWordGeneratorhas text left to process.String next(): returns the next word of the underlyingScanner. If theScannerdoes not have words left, then the behavior ofnext()is undefined (i.e., you don’t have to check or handle this case).int getWordCount(): returns the number of words produced by theWordGeneratorso far.int getSentenceCount(): returns the number of sentences produced by theWordGeneratorso far. Define a sentence to be the number of occurrences of words where a punctuation mark appears at the end—'.','!', or'?'.
Part 2: Displaying Text
Separate from reading text from the text file is displaying the text to the screen.
Normally, we would use the Java Swing API to do this which is Java’s built-in GUI framework.
However, Swing is a complicated (albeit well-engineered) library, so rather than using it directly, we’ll use a wrapper class that makes drawing stuff to a window easy: the DrawingPanel (credit to Stuart Reges and Marty Stepp at the University of Washington who use this class in their book, Building Java Programs).
Here is the essential usage of DrawingPanel:
import java.awt.*;

public void demonstratePanel() {
    DrawingPanel panel = new DrawingPanel(400, 300);
    Graphics g = panel.getGraphics();
    Font f = new Font("Courier", Font.BOLD, 46);
    g.setFont(f);
    g.drawString("Hello World!", 100, 100);
}
- The relevant classes we need to draw to the DrawingPanel are found in the
java.awtpackage. To make all of these classes available without using their fully-qualified names, instead of naming each one individually, we use*to import them all. - We create a
DrawingPanelby invoking theDrawingPanel(width, height)constructor which creates a panel of the specified dimensions and immediately makes it visible on the screen. - We grab the graphics context object (an instance of the
Graphics) class with thegetGraphics()method. - We set the font by creating a new
Fontobject. The constructor for aFonttakes the name of the font, its style, and the size (in points). We then set the font for the graphics context with thesetFontmethod. - Finally, we use the graphics context to render text to the window.
Here we use the
drawStringmethod which takes the string to render and where to render it.
The DrawingPanel class is available as a separate Java file found in the speedreader package.
Since it is in the same package as your other source files for this project, you can reference it directly without the need for import statements!
Part 3: Animating Text
The final component to rendering the text is doing so in an animated way.
To do this, we’ll simply render the text in a loop but in each iteration of the loop, delay execution by causing the program to sleep.
To do this, we’ll use the sleep(milliseconds) function of the Thread class:
public void printStaggered() throws InterruptedException {
    while(true) {
        System.out.println("Hello World!");
        Thread.sleep(1000);
    }
}
This snippet of code constantly prints Hello World to the console but in one second intervals.
The argument to Thread.sleep is the amount of time the program should wait in milliseconds.
Note that like the Scanner above, Thread.sleep throws the checked exception InterruptedException.
We use a throws clause here to avoid handling the exception explicitly.
Part 4: Putting it Together
Finally, you should put all these concepts together to create a program SpeedReader that exists in a file SpeedReader.java which reads in a file and displays it in the RSVP style to a DrawingPanel.
Your program should use your WordGenerator class to read the file and after displaying the text file report the number of words and number of sentences it processed.
Your program should take a number of command-line arguments to customize its behavior. Here’s a description of its usage:
Usage: SpeedReader <filename> <width> <height> <font size> <wpm>
filenameis the text that should be read.widthis the width of the window.heightis the height of the window.font sizeis the size of the font used.wpmis the speed at which the words are displayed in words per minute
If the user does not specify this exact amount of arguments, then you should print a usage message and exit. You may assume without checking that:
- The
filenamepoints to a valid file on disk. - The
width,height,font size, andwpmare all positive integers.
You can use the parseInt static method of the Integer class, i.e., Integer.parseInt(s) to convert a string into an int.
The text should be rendered in the “Courier” font, and the text can be rendered in a location of your choosing. Ideally, you would render the text to the middle of the screen, but this is slightly complicated because the size of the font does not necessarily correlate with how large the string is. Centering the text (and other visual improvements) is an optional improvement you can make to your program!
Part 5: Usability Testing
Now that your speed reader is complete, you can now run usability tests over it. In particular, we will conduct a small test to answer the question: “does speed reading impact our ability to comprehend what we read?” In the field of human-computer interaction, researchers use usability tests to understand how real people interact with technology. They then use this information to decide how to better design software and hardware that people can use.
The setup for the tests proceeds as follows:
- Develop a corpus of texts to be used by your study participants. This should include approximately 8–10 excerpts of texts found on the Internet, e.g., wikipedia.org articles or gutenberg.org. Each excerpt should contain several paragraphs, ideally enough text so that speed reading at 350 WPM takes a minute or two per excerpt.
- For four of the excerpts, develop a small comprehension quiz consisting of five comprehension questions each that require the reader to comprehend the text they are reading. These questions should be about facts regarding the content of the excerpts, not the particulars of the text, e.g., do not have questions to the effect of “how many three-letter words did the excerpt contain?”. The remaining texts will be used to help the user train on the system.
To run the test, find at least one, ideally three, participants that are willing to take your test. These should be individuals not currently in CSC 207—ideally, they shouldn’t be computer science majors! With each participant, do the following:
- Tell the participant what the study is about, what you are trying to analyze, and what the procedure for the test is, i.e., the steps below. You do not need to hide anything from your participants!
- Instruct the users on how to use your speed reader application. Show them the application and how it works. You may run the application for them to avoid the need to explain how to run a Java program!
- Give your participants 15 minutes to train using the application. Using the non-quiz texts in your corpus, let your participant use the speed reader at various speeds to become accustomed to the application. At this stage, the participant may go back and re-read texts as much as they would like to gain experience speed reading.
- When they are ready, choose one of your quiz-texts at random and allow the participant to read the text without the use of the speed reader, i.e., in a plain text editor. They may read the text at their own pace. Once they are done, administer the quiz—the participant is not allowed to consult the text again at this point. Record which text was chosen along with the results of the quiz.
- Repeat the previous step for the remaining quizzes. However, rather than letting the participant read the text in a text editor, have them use your speed reader instead. Each text should be read at a different speed—250, 350, and 500 WPM. Furthermore, the participant should only be allowed to speed read the text once. Again, record the text chosen, the WPM the text is read at, and the results of the quiz.
- After this step, the test is done. Make sure to thank your participant!
You should include your excerpts in your repository as additional text files.
In the README.md file in your repository, include the following information:
- The sources of each of the excerpts, i.e., the URLs where you found them.
- The questions for the four texts with associated quizzes.
- The names and Grinnell emails of your participant(s).
- The results of your quizzes as described above.
Finally, add a paragraph in your README.md file briefly analyzing your results by answering the following question:
Did your participants demonstrate that they were able to comprehend what they were reading with your speed reader?
Project Structure and Gradescope Turn-in
When you are done, your project should have the following contents (and, perhaps, additional files):
SpeedReader/
┠─ pom.xml
┠─ README.md
┠─ <Text files used in your study>
┠─ target/
│  └─ ...
└─ src/main/java/edu/grinnell/csc207/speedreader/
   ┠─ DrawingPanel.java
   ┠─ SpeedReader.java
   └─ WordGenerator.java
You can then upload your final project to Gradescope
Make sure that your program passes the autograder tests on Gradescope.
Some of these tests will check whether your project has the correct directory structure.
Other tests will check the correctness of your WordGenerator class.
We will manually check the overall application since it is graphics-based!
More Enhancements
There are lots of improvements to be made to your speed reader! Enhancing your program beyond the requirements stated above is not necessary, but if you want more practice, here are some suggestions:
Checking for Invalid Arguments
In the interest of focusing on the larger task at hand, we did not require that you perform type checking on the arguments to the program. We should probably do that!
To check to see if a file exists on disk, File objects have an exists method, e.g., file.exists(), that returns true if and only if the file exists on disk.
To perform error checking on the integers, note that Integer.parseInt(s) throws an NumberFormatException if s cannot be parsed as an integer.
We can use a try { ... } catch (NumberFormatException e) { ... } block to catch this error if it is thrown.
Centering the Text
To center the text on the screen, you need to appeal to an additional class, FontMetrics, to discover how much space a given string will take up on the screen.
To obtain an appropriate FontMetrics object, use the getFontMetrics() method of the Graphics class.
From there, you’ll need to figure out the appropriate methods to use as well as the math to get the text to be centered on the screen.
Focus Letters
Even after centering the text on the screen, you can still improve how words are displayed! You may have noticed that excessively long words can sometimes disrupt your speed reading when they are naively centered on the screen. Spritz and other systems use the following heuristic to align text on the screen:
Choose a focus letter based off the length of the overall word and center the word around the focus letter:
- length = 0-1 => first letter
- length = 2-5 => second letter
- length = 6-9 => third letter
- length 10-13 => fourth letter
- length >13 => fifth letter
Also, color the focus letter differently from the other letters, e.g., in red.
Semantic Mysteries
The project repository for this week’s labs can be found at:
Make sure to create a new repository from this template repository on your account (“Use this template” → “Create a New Repository”) and add your partner(s) as collaborators. Remember to periodically commit and push your work throughout the week!
Part 1: Puzzling Through Problems
In this lab, we explore the semantics of objects in the context of Java. That is, we will integrate the object—a programming entity with state and behavior—into our mental model of computation. By doing so, we can answer some critical questions about how programs with objects execute in certain unintuitive settings as well as explain some bits of Java syntax that we have glossed over until this point.
These are all questions that have “obvious” book answers, but they require a bit of effort on your part to internalize what they mean with respect to your programs. Try to (a) answer the question in your own words and (b) give an example illustrating your answer, e.g., example code snippets demonstrating the differences between two different situations. You should feel confident enough in your answer to explain this concept to someone that is new to Java!
Problem 1.1: Value versus Reference Semantics
What is the difference in calling the following three change methods, and why is this the case?
// in Cell.java
public class Cell {
    public int x;
    public Cell(int x) { this.x = x; }

    public static void change1(int x) {
        x = 5;
    }

    public static void change2(Cell c) {
        c.x = 5;
    }

    public static void change3(Cell c) {
        c.x = 5;
        c = new Cell(0);
    }
}
What’s the rule here? Does java pass parameters by value (i.e., copy) or by reference? Is passing an object (with an arbitrary number of fields) to a function more costly than passing a primitive?
Problem 1.2: The this Variable
What is the this variable in a method, and where does it come from?
How do these four classes differ with respect to their increment methods?
// In Counters.java
class Counter1 {
    public int value;
    public void increment() {
        value += 1;
    }
}

class Counter2 {
    public int value;
    public void increment(int value) {
        value += value;
    }
}

class Counter3 {
    public int value;
    public void increment(int value) {
        this.value += value;
    }
}

class Counter4 {
    public int value;
    public void increment(int value) {
        value += this.value;
    }
}
What’s the rule for variable look-up in Java? How does this differ from function calls in C?
Problem 1.3: static Versus Non-static Members
What is the distinction between a static and non-static member (i.e., field or method)?
In particular, imagine using this variant of a counter:
// In Static.java
class Counter {
    public static int value;
    public Counter() {
        value = 0;
    }
    public void increment(int value) {
        this.value += value;
    }
}
And why does this code not work? How do you fix it?
In general, what is the rule for mixing static and non-static things?
Does this code work?
Why or why not?
// In static.java
public class Static {
    public void printGreeting() {
        System.out.println("Hello World!");
    }
    public static void main(String[] args) {
        printGreeting();
    }
}
Problem 1.4: Reference Versus Structural Equality
Does the following code snippet behave as you expect? Why? How do you fix its behavior?
// In Ref.java
public class Counter {
    public int value;
    public Counter() { this.value = 0; }
    public void increment() { this.value += 1; }
    public static void main(String[] args) {
        Counter c1 = new Counter();
        Counter c2 = new Counter();
        System.out.println("Are c1 and c2 equal? " + (c1 == c2));
    }
}
With this in mind, does this code behave as you expect?
String s1 = "hello";
String s2 = "hello";
System.out.println(s1 == s2);
How about this snippet? What’s the difference between these two snippets and why?
Scanner in = new Scanner(System.in);
String s3 = in.nextLine();    // Suppose the user types the same
String s4 = in.nextLine();    // line for both s3 and s4...
System.out.println(s3 == s4);
Part 2: Assertions
In these problems, you’ll work your ability to reason about program properties and whether they are preserved throughout execution. Knowing whether a property is preserved within a program is a cornerstone of efficient debugging as we will discuss in the coming days.
Problem 2.1
Consider the following method:
public static int foo1(int x1, int x2) {
    // Point A
    if (x1 < 0 || x2 < 0) {
        return -1;
    }
    // Point B
    int y1 = x1 % 10;
    int y2 = x2 % 10;
    int z = 0;
    // Point C
    if (y1 < y2) {
        z = y1 - y2;
    } else {
        z = y2 - y1;
    }
    // Point D
    return z;
}
Now, consider whether each of the propositions holds at the given point in the method all the time (✓), some of the time (?), or none of the time (✗):
- Point A:
x1 == 0x2 < 0
- Point B:
x1 == 0x2 < 0
- Point C:
y1 < 5y2 > 0
- Point D:
z > y1z < 0
Problem 2.2
public static String foo2(String s, char c) {
    String ret = "";
    // Point A
    if (s == null) { throw new IllegalArgumentException(); }
    if (s.length() < 2) { return s; }
    // Point B
    for (int i = 1; i < s.length(); i++) {
        // Point C
        ret += s.charAt(i);
        ret += c;
        // Point D
    }
    // Point E
    return ret;
}
Now, consider whether each of the propositions holds at the given point in the method all the time (✓), some of the time (?), or none of the time (✗):
s.length >= 2 | ret.length() > 0 | ret.length() % 2 == 0 | |
|---|---|---|---|
| Point A | |||
| Point B | |||
| Point C | |||
| Point D | |||
| Point E |
Testing Frameworks
You have certainly written tests in other programming languages, but perhaps in an ad hoc fashion. One of the niceties of Java is its strong support for testing through the JUnit testing framework for unit testing and the Jqwik library for property-based testing. Not only are the libraries robust, but there is also deep integration of these frameworks into Java IDEs such as VSCode. This makes test development, execution, and monitoring painless… dare, I say, joyful, in Java!
Part 1: The JUnit Testing Framework
JUnit is a combination of:
- A Java library for writing unit tests.
- An execution engine for executing tests.
- An API for extending the framework with additional functionality.
Subsequently, it would be quite a challenge to manually integrate JUnit into our project. Thankfully, there is where Maven shines!
To add JUnit to our project, we only need to add the appropriate dependencies to the Maven’s pom.xml file and Maven will take care of downloading all the appropriate libraries and integrating them into the project.
This has already been done for you with this lab, but inspect pom.xml and observe the following additional lines:
<dependencyManagement>
  <dependencies>
    <dependency>
      <groupId>org.junit</groupId>
      <artifactId>junit-bom</artifactId>
      <version>5.11.4</version>
      <type>pom</type>
      <scope>import</scope>
    </dependency>
  </dependencies>
</dependencyManagement>

<dependencies>
  <dependency>
    <groupId>org.junit.jupiter</groupId>
    <artifactId>junit-jupiter</artifactId>
    <scope>test</scope>
  </dependency>
  <dependency>
    <groupId>net.jqwik</groupId>
    <artifactId>jqwik</artifactId>
    <version>1.9.2</version>
    <scope>test</scope>
  </dependency>
</dependencies>

<build>
  <plugins>
    <plugin>
      <artifactId>maven-surefire-plugin</artifactId>
      <version>3.5.2</version>
    </plugin>
  </plugins>
</build>
Here’s what we added:
- Within the
<dependencies>tag we added two Java modules:junit-jupiteris the JUnit library that we will use to author unit tests.jqwikis the Jqwik library that we will use to author property-based tests. Notably, both modules are only available with thetestscope (via the<scope>tag) so that these libraries are only accessible during testing and not during normal development. We’ll see how Maven separates the “main build” from the “test build” below.
- Within the
<build>tag, we add themaven-surefire-plugin. This is Maven’s direct integration point with JUnit, allowing us to run tests directly from Maven via thetestsubcommand. - Finally, under the
<dependencyManagement>tag, we add thejunit-bomdependency which helps Maven ensure that it uses consistent versions of the variousjunitframework libraries it downloads.
Additionally, the structure of our project has changed slightly.
Look inside the src directory and see that there are now two sub-directories:
src/maincontains the code used in the main build of the project. Within this directory is ajavadirectory which, in turns, contains the normal package structure of our Java project.src/testcontains the code used in the test build of the project. Similarly tosrc/main, this directory all contains ajavadirectory which contains our Java test code.
Maven manages the build so that code inside src/test can reference code inside src/main, but not vice versa.
This makes sense because we want to test our code, but our code does not necessarily need to know about the tests!
[!TIP] In the future, you’ll inevitably run into build issues and need to diagnose things. Be aware that the current version of JUnit is JUnit 5 which features many architectural changes from JUnit 4. If you search around for help, be aware of what JUnit version your resource is talking about! When in doubt, try to extract as much information from https://junit.org as possible which will, hopefully, be up-to-date!
Part 2: Unit Testing
With all that front-matter out of the way, let’s get to testing! First, we’ll investigate unit testing, isolated testing of individual program components, usually at the level of classes or individual methods.
In edu.grinnell.csc207.testing.Functions, you will find the (broken) implementation of the thirdGreatest(arr) function that returns the third-greatest element found in arr from the previous lab.
If you debugged this function from the previous lab, feel free to fix the method.
Regardless we will write tests to verify our work!
Our tests for the thirdGreatest function are found in edu.grinnell.csc207.testing.ThirdGreatestTests.
Each test is realized as a single member function of the ThirdGreatestTests class.
Below is the code relevant to the single unit test we’ve provided in the lab as an example:
import static org.junit.jupiter.api.Assertions.assertEquals;
import org.junit.jupiter.api.Test;

// ...

public class ThirdGreatestTests {
    @Test
    public void exampleUnitTest() {
      int[] arr = { 3, 8, 4, 7, 2 };
      assertEquals(4, Functions.thirdGreatest(arr));
    }
  // ...
}
The test in question is exampleUnitTest.
We use the @Test annotation to signal to the JUnit testing framework to treat exampleUnitTest as a test.
Annotations are user-defined metadata we can hang on different components of our program.
These annotations can then be programmatically manipulated by language analysis tools, in this case, the JUnit framework.
Within exampleUnitTest, we use the assertEquals(expected, actual) static function to demand that some expected value is equal to the actual value being produced.
In this specific case, we assert that the third-greatest value of arr should be 4.
To run our tests in VSCode, we can proceed by clicking the testing vial icon in the left-hand side of VSCOde.
From the testing panel, you can see a list of the tests mined from the project and selective run all or some of the tests.
We can also run all tests directly through Maven on the command-line with mvn test.
Although, since we are already in VSCode, we should favor using the VSCode UI to enjoy the prettier output!
Regardless of how you do it, run this test and observe the output below your source code in VSCode. You should see that successful tests are highlighted in green. If a test fails, it is highlighted in red with a relevant error message to help you in the debugging process!
With this in mind, write a complete unit test suite for thirdGreatest, using exampleUnitTest as a template.
Create one additional method per test, making sure to use the @Test annotation to flag the method as a test.
We will have more to talk about regarding the different dimensions to test comprehensiveness later.
For now, you can take a white-box approach to testing the function known as optimizing test coverage: consider writing tests so that every line of code of the method is exercised in some fashion by some test.
Note that by doing so, you naturally cover most of the regular case/corner case scenarios that you would have otherwise written!
Part 3: Property-based Testing
Unit testing is a natural extension of the testing you have done in the past. But this form of testing is narrow in the sense that we can only test modules on particular inputs and outputs. There is always a question of whether there is some input that we didn’t consider that might cause the program to break!
An alternative to specific, narrow unit testing is reasoning about properties of our programs instead. General properties have the benefit of being broad, i.e., applying to all possible outputs, they are frequently less specific. That is, a general property may only capture some part of correctness, so we need a collection of properties to gain confidence that the right thing is being done.
Another problem is how we verify properties. Previously, this has been the realm of mathematical proof which is not the subject of the class! Instead, we’ll use a relatively new technique—property-based testing—to verify properties of our programs. In property-based testing, rather than relying on proof, we automatically generate a large number of randomly-generated inputs to our program and then check to see if the property holds of those particular inputs. If we believe we sampled the inputs in a well-distributed fashion and sampled enough of them, we can have confidence that the property holds!
A property-based testing library provides two things to accomplish this goal:
- An API for specifying properties within a program.
- An API for automatically generating different values.
Let’s look at how the Jqwik library accomplishes this in ThirdGreatestTests.
// ...

import net.jqwik.api.*;
import net.jqwik.api.constraints.*;

public class ThirdGreatestTests {
    // ...
    @Property
    public boolean examplePropertyTest(
            @ForAll @IntRange(min = 1, max = 1000) int sz,
            @ForAll int k) {
        int[] arr = new int[sz];
        for (int i = 0; i < sz; i++) {
            arr[i] = k;
        }
        return Functions.thirdGreatest(arr) == k;
    }
Whereas JUnit tests are marked with @Test, Jqwik tests are marked with @Property.
Each property is realized as a method that returns a boolean value.
examplePropertyTest captures the property that for any input array of arbitrary size sz, if that array is made up of the same value k, then thirdGreatest should return that value k.
How does Jquiwk know to generate random inputs to examplePropertyTest?
Via the @ForAll annotations on each of the arguments to the method!
Marking k as @ForAll instructs Jqwik to randomly sample all possible integers to provide example values for k.
Not all possible integer values are valid as an array size, e.g., negative integers.
Thus, we also use the @IntRange annotation to specify a min and max range to the random numbers that may be generated for sz.
So what does Jqwik do?
Jqwik generates (by default) 1000 sets of random arguments to examplePropertyTest.
If any of the sets causes examplePropertyTest, then Jqwik has found an example that falsifies the property!
It reports that specific example back to you, so that you can use that information to fix your code.
Otherwise, Jqwik did not find any falsifying examples so it reports success.
Note that this doesn’t definitively mean the property holds of our function, but it gives us significant confidence that the property holds!
Like with JUnit, write a collection of property-based tests using Jqwik for thirdGreatest using examplePropertyTest as a template.
You’ll immediately notice a distinction between writing unit tests and property-based tests: property-based tests are much harder to come up with!
We have to be somewhat creative in coming up with meaningful properties that exercise our program in useful ways.
Try to come up with at least two additional properties.
A starting point might be to consider generalizing the behavior of one or more of your unit tests to arbitrary elements or array sizes.
Additional Practice: Test-driven Design
Now that you have experience using JUnit and Jqwik, let’s get additional practice both writing fundamental Java code and tests with JUnit and Jqwik. For each function below:
- Implement the function in
edu.grinnell.csc207.testing.Functions. Make sure to include a Javadoc comment with all the sailent tags! - Create a new testing class in the
src/testsource hierarchy for that function. Write both a comprehensive unit testing suite and at least one property-based tests for the function.
Complete the first of these functions, but you are free to tackle the remainder for additional practice as time permits.
Summation
Write a function called sum that takes an integer n as input and returns the sum of the first n integers (i.e., 0 through n inclusive).
You should use a loop rather than an explicit formula in your method.
(Note: this is an intentionally easy problem so that you can get in the habit of using the testing tools!)
Minimum
Write a function called min that takes an array of integers arr and returns the minimum element in the array.
If there are no elements in the array, you should throw an IllegalArgumentException.
Lucas Sequence
Write a function called lucas that takes an integer n and returns the nth Lucas Number.
The Lucas sequence is similar to the Fibonacci sequence in that the recurrence that defines the numbers is .
However, and , unlike the Fibonacci sequence which defines the first two numbers to be and .
You should use a loop rather than an explicit formula or recursion in your method.
Substring
Write a function called substringIndex that takes two arguments, a string s and a string t, and returns an integer corresponding to the starting index of the first occurrence of t in s.
The method returns -1 if t does not occur in s.
If s or t are null, the method throws an IllegalArgumentException.
Sort
Write a method called sort that takes an array of integers arr and sorts the array in-place.
sort.
(Hint: write a loop invariant that divides up the array into an unsorted and sorted region in terms of the loop variable i.
Your for-loop should then be responsible for preserving the invariant on every iteration of the loop.)
Empirical Complexity Analysis
The maximum contiguous subsequence sum (mcss) of an array is the largest sum you can acquire by adding up consecutive elements of an array. For example, consider the following array:
[5, -8, 7, 7, -1, 9, -6, -4, 5, -7]
The mcss of this array is 22, corresponding to the subsequence [7, 7, -1, 9].
Note that if the array consists of non-negative numbers then the subsequence is simply the entire array.
We say that the mcss of an array consisting of all negative numbers is zero.
For this lab, you won’t be writing code to solve this problem. Instead, you’ll be analyzing the time complexity of various solutions to this problem.
The three functions, compute1, compute2, and compute3, all return the mcss of the given array.
This file can also be found in the edu.grinnell.csc207.complexity package of this week’s repository.
However, you should download this file to a folder and use javac and java to compile and execute this program independently of our Maven project for the week.
The reason why are doing this is that we will measure the actual time it takes to execute the program in Part 1, and we don’t want to also measure the time Maven takes to run while doing so!
Part 1: Wall-clock Time
First, we will use the Unix time utility to test how long each function takes to run.
For example, we can compile and run the program at a terminal window as follows:
> javac MaxContiguousSubsequenceSum.java
> time java MaxContiguousSubsequenceSum
Generating a random array of size 10... complete!
arr = [-3, 7, 6, -2, 1, -2, 3, -8, 3, 8]
compute1(arr) = 16
compute2(arr) = 16
compute3(arr) = 16

real    0m0.171s
user    0m0.089s
sys     0m0.045s
time runs the program (and arguments) passed to it and reports the time taken for that program to execute—the total time real, the amount of that time spent in user code user, and the time spent in system code sys.
On Windows, you can use Measure-Command to get a similar effect:
> javac MaxContiguousSubsequenceSum.java
> Measure-Command { java MaxContiguousSubsequence }
Note that when you use Measure-Command, the output of the program is suppressed in favor of reporting the time taken for it to run.
Now, modify the code and re-compile it so that the program runs only one of the functions, e.g., compute1.
Run the program at least three times and record the average total time that you obtain for the function at a
particular array size (the size is controlled by the size and range local variables in main.)
Repeat this process for each function and the following array sizes:
101000, and100000.
Open up a spreadsheet program, e.g., Excel or OpenOffice, record your average time for each size, and graph the data you collect. The -axis of your graph should be the size of the array and the -axis should be the time taken.
Note that for some combinations of function and larger array sizes, the code might take too long to execute! In these cases, you can let the code run for a minute to see if it will complete. If it does not, you can record the time taken as “∞”.
Part 2: Counting Operations
While wall-clock is what ultimately matters when we talk about program performance, there are significant limitations to timing our programs over many inputs to assess its performs. One of those limitations is that wall-clock is highly sensitive to the particulars of the machine we run our programs on. We can avoid that limitation by instead counting the critical operations that a function performs. While the time a program takes to execute may vary widely on the state of computer, the program will perform the same number of critical operations no matter where the program executes. (This is true for the deterministic programs that we write in this course. With more complex programs, other factors become relevant which can make this method of analyzing program complexity less accurate!)
For mcss, we’ll consider the number of array accesses that each function performs.
Let’s define an array access as any case where the function reads an array value (e.g., arr[0] + 1) or writes an array value (e.g., arr[0] = 10).
Assuming that the array accesses dominates the runtime of the functions, then counting array accesses should be tantamount to measuring the time each function takes.
Augment the three functions so that rather than returning the mcss of the given array, they report the number of array accesses each function makes while computing the mcss.
You can create a static int field called count in MaxContiguousSubsequence to easily record the counts.
Use your augmented program to repeat the experiment from the first part of this lab: collect the number of array accesses required for each function for the following array sizes:
101000, and100000.
For each function, graph the data you collected in your spreadsheet. The -axis of your graph should be the size of the array and the -axis should be the number of array accesses.
Compare the graphs from the previous parts of the lab and answer the following question in your project’s README.md file under the Write-up section.
How accurate is the operation counting method of measuring time complexity compared to the wall-clock method for understanding how the time complexity scales with the size of the input?
Finally, add your spreadsheet (downloading it from the Web if you used browser-based Excel) to your repository. You can place the spreadsheet in the root of your project directory, and add/commit like your other source files!
The World’s Bestest Internship
Welcome to Gamewerks Corporation! After talking to some friends who took 207, you learned about an amazing opportunity to work for the best game design studio on the planet, at least, according to the advertisement they found on bulletin board in the JRC. You had your reservations but after your friends assured you that “the codebase was immaculate” and “you certainly won’t rip out your hair,” you decided to give it a shot.
You are now sitting in your office on your first day with your internship partner in a rundown building in downtown Des Moines when you boss comes in and screams:
“[Insert your name here], we have a crisis again! Our last intern who was working on the game quit while refactoring the codebase! We need to get the latest version of the game out by next Wednesday. If we don’t do it, our publisher will have our heads on a stick. You need to dive into the codebase, fix the last few bugs, and ship it!
Well this seems completely unreasonable given this is your first day, but because your boss has absolute power over you, you acquiesce to their demands.
Github
First thing first: you need to get the code. Gamewerks Corporation uses Github to store their source code.
(Why is the corporate repository stored on your 207 professor’s personal Github account? Who knows…)
Your boss wants you to follow the same practices you used in your CSC 207 class: make a new repository on your personal Github account that is a copy of this template repository. That way you can make changes on your own without disrupting everyone else’s workflow.
Your boss also tells you that it is company policy to commit to your repository at least once per major task that you perform. In other words, you keep in the back of your mind that you should commit your work and push your changes after completing each part of this internship.
Preamble: Block-what?
Of course, you have no idea what kind of game this is. Without knowing how the game works, you don’t really have any way of fixing bugs. So you, first, ask your boss what exactly this Blocky stuff is:
“…it’s Tetris.”
Oh, well that explains it. You should make the program behave like the classic game, Tetris. You know you don’t really need docs for this because you can simply Google one of the billion Tetris clones out there (you observe that Tetr.io is particularly popular) to get a feel for how it works.
As you get your bearings, your boss mentions one more thing:
“…well, it’s more than just Tetris. It is a riff on Tetris the Grandmaster by Akira. We use the Akira Rotation System here.”
Wow. He said that with some sass, like this is a thing or something. Well, whatever. This is good information to know, but you probably don’t need to worry about it…
Part 1: The Lay of the Land
The first thing you should do is understand the codebase. Conveniently, your boss observes:
“The old intern was working on an architecture document, found in
ARCHITECTURE.mdat the root of the project repository. It is partially complete, but they left a number of holes! Fill them in for us, please!”
Well, you can’t complain. You were going to sift through the codebase anyway. Writing down what you find into this document seems like it helps everyone, so you decide to give it a shot! Once you are done, you remember to commit your changes to your repository so you have a log of completing this step!
Part 2: Testing the Well
With the architecture document completed, you have a better sense of how the code is organized. Your boss comes to you with your first real task:
“That intern left after writing the code to check and perform line completions in the well. They began writing tests, but then they ghosted us! Can you complete the test suite for the well class? You can just worry about testing detecting line completions and deleting rows.”
Ghosted, what?
Well, nevertheless, that’s a concrete enough task.
You set to work writing a reasonably robust test suite for the Well class’s line completion functionality.
After you finish the suite, you remember to commit your changes to your repository again!
Part 3: Emergency Debugging
Now your boss comes to you with more things to do:
“That stupid intern couldn’t fix all the bugs before they left! Can you finish up their work please?”
Man, are you just cleaning up after people? Whatever, it’s a job, so you set to work. You check the bug queue and find three reports:
Caution
When a piece move off the right end of the board, the program blows up!
Caution
While tapping on the shift right key works, holding down the key does not cause the active piece to move!
Caution
New blocks spawn too fast! There should be an entry delay, the ARE, between when a block clicks into place and when the piece appears. This is even more obvious when you use a soft drop to lock a piece into the well immediately. I know the ARE is a game attribute currently; it just doesn’t seem to be used? Also, there is similarly a line delay that should be respected when a line is cleared. That is also a game attribute, but it doesn’t get used!
These bug reports aren’t… great. You expect a lot more detail, maybe even specific reproducibility instructions, in a good bug report. Nevertheless, these look like serious issues, so you dive into bug fixing, keeping in mind your architecture document as a guide and the debugger as a tool to better understand how the code works. After you all done, you remember, yet again, to commit your changes to your repository!
Part 4: Random Block Generation
After getting the game into a playable state, you have noticed that it is still broken!
In particular, it looks like only the “I” block spawns every time a new block is required; this isn’t how Tetris Blocky should work!
You look up online on what to do, and it appears that the official Tetris Blocky standard states that you should:
- Have (a) an array containing all the possible block kinds and, as a piece of state, (b) the current index of the array you are on.
- Shuffle the contents of the array.
- When you need to get a random block kind, return the piece corresponding to the current index you are on and then increment the index.
- When the array is exhausted, i.e., the last piece has been returned, reshuffle the array and reset the current index.
In this manner, it looks like that you will never randomly generate two block kinds without first generating all the other kinds beforehand.
From this algorithm you have identified that you need:
- An array to hold the blocks.
- An integer to remember the current index.
However, your boss says that you aren’t allowed to use the Java standard library to shuffle the array for you! This makes absolutely no sense because the rest of the code base does this, but again, they have power over you.
Luckily, you have identified the Fisher-Yates Shuffle as an appropriate algorithm for shuffling an array.
You will likely need to create a shuffle method that takes an array of pieces and shuffles them as a result.
So you concede the point and implement these things along with the random piece generator, taking care to integrate your changes appropriately into the pre-existing code.
You also note that the ThreadLocalRandom class and its current() static method allow you to fetch a Random object that you can use to generate random numbers.
After you are done, you remember to commit your changes yet again to log your progress.
Update Your Changelog
Whew. At this point, the game is in… well, some playable condition. Mission accomplished!
At this point, you remember that it is Gamewerks policy to include a changelog in the project’s CHANGELOG.md file that captures all the changes you made to your codebase.
You find it a bit redundant since you could always query git for this information, but this changelog is supposed to contain the output of running the git log command in the terminal, verbatim.
Oh well, you go ahead and make your edits, also making sure to fill in the remaining TODOs in README.md, e.g., your name and resources used.
Turn-in
Finally, once you are done, you know that you should commit/push your work and submit it to Gradescope when you are done.
Why Gradescope when this is an internship?
Who knows, but you know you’ll want to ensure that your repository has the following folder structure:
┠─ pom.xml
┠─ ARCHITECTURE.md
┠─ README.md
┠─ .git/
│  └─ ...
└─ src/
│  └─ ...
You also know that once you are done submitting your work, you should get your things and leave the building as soon as possible, so you don’t go down with this sinking ship.
List Implementation
In this week’s labs, you’ll implement the list abstract data type in two ways: arrays and links. Fork the repository found here to your Github account:
Clone your copy of the repository to your computer and complete the basic implementation of the ArrayList and LinkedList classes.
This includes filling out all the basic list methods found in each class.
Add appropriate Javadoc comments to each method.
In addition to including relevant @param and @returns tags, also include the worst case runtime of the method in Big-O notation.
Check with a member of the course staff after you complete each method, and they will verify your runtime.
Additionally, complete the test suite for each of the classes (ArrayListTests.java and LinkedListTests.java, respectively).
To do this, make sure to write unit tests that cover normal-case and base-case scenarios for each method.
Also, write at least one additional property-based tests for each of your list implementations.
(Hint: the two list implementations share the same set of methods, so they can probably share the same tests…!)
Additional practice
Once you complete your basic list implementation, feel free to implement the following methods for additional practice working with array-based and linked-based lists.
Extended Basic List Methods
boolean isEmpty(): returnstrueif and only if the list has no elements.void clear(): removes all the elements from the list.int indexOf(int value): returns the index of the first occurrence ofvaluein the list or-1ifvalueis not in the list.boolean contains(int value): returnstrueif and only ifvalueis found in the list.void add(int index, int value): addsvalueto the list atindex, throwing anIndexOutOfBoundsExceptionifindexis out of range (index < 0 || index > size()).
Advanced Operations
Want even more practice with list operations? Try implementing the following methods:
String toString(): returns a string representation of the list in the form"[x1, x2, x3, ...]".boolean equals(ArrayList other)andboolean equals(LinkedList other): returnstrueif thislistis equal toother, i.e., they contain exactly the same elements in the same order.ArrayList concat(ArrayList other)andLinkedList concat(LinkedList other): returns a new list that contains the elements of this list and the elements of theotherlist.
Text Editor
Text editors are seemingly simple applications since all they do is allow a user to edit plain text files which amounts to simple string manipulation. However, are deceptively complicated programs! A naive approach to implementing a text editor can lead to poor performance especially when viewing and editing large files. We must be mindful of our choice of data structures that back a text editor, taking advantage of the particular ways a text editor edits its text.
Thus, a text editor is an excellent case study bridging together our discussion of complexity analysis with the pragmatic engineering decisions we must make when choosing data structures! In this project, you’ll:
- Implement a core engine for a text editor, a text buffer, in two different ways, with a simple string and a gap buffer.
- Create a test suite for these two engines to verify their correctness.
- Analyze the complexity of insertion into these two different buffers to demonstrate the inefficiencies of one model and the efficiencies of the other.
- Build a very simple, terminal-based GUI for your text editor using the Lanterna text-user interface (TUI) library.
A Note on Projects and Exploring Computer Science
In my opinion, the best way to get better at computer science is by immersion. Because computer programming allows us build real, tangible artifacts with a relatively low barrier to entry, we can always dive deep into a subject of interest simply by trying to recreate the canonical program in that area. Even we are not successful, simply getting our hands dirty helps us exercise all the skills we learn in our coursework!
Moving forward, most of the projects will have this flavor of the beginnings of a deep dive into a more complex topic. If the topic of a project interests you, I highly encourage you to use your project as a starting point for a deeper exploration into this space. In particular, text editors are well-studied, and there are many resources online to help you flesh out your project further! While older, I like pointing people to Finseth’s The Craft of Text Editing –or– Emacs for the Modern World which walks the reader through the implementation of an Emacs-like text editor in C. It is freely available at the URL below:
As we move forward in the course, I will point out additional “deep dive” resources to you, to hopefully inspire you to pursue your interests outside of class! If you would like additional resources in an area we investigate or any resources that we do not investigate, let me know! Also, if you feel that you are not particularly inspired by any area of computing we discuss, that’s ok! I encourage you to pick anything even remotely interesting and deep-dive; it is the act of doing, not the end result, that matters!
Personal Projects and Public Hosting
I highly encourage you to use any of your projects as a starting point for a deeper exploration into computing. As an author, be aware that you hold the copyright on the code you create. However, I ask that you do not make your project code publicly available unless you make substantial modifications to your program. This is to maintain the usefulness of these projects as assignments for other instructors. Additionally, if you use a project as part of your portfolio for the purposes of employment, companies will want to see work done outside of class of your own volition versus work that was required!
Getting Started
The starter code for this project is located at the following template Github repository:
If you haven’t done so already, make a copy of this template repository on your personal account, add your partner as a collaborator, and clone this repository to your local machine.
There are no specific requirements to your Git usage for this project, but you should practice good Git habits:
- Commit changes often, whenever you make significant progress on a task.
- Only commit code that you verified builds, i.e., don’t ever leave your repository in a broken state!
- Give your commits brief, but informative messages that summarize your changes.
- Make sure to frequently push your changes to Github, so that your work is backed up in the cloud.
When you are done with this project, you should upload your Github repository to Gradescope. To do this, you should link your Github account to your Gradescope account (via your account settings). Once this is done, on project submission, you can choose to submit this Github repository directly. Before you do this, make sure that all your changes have been both committed to your local repository and pushed to your Github repository!
Background: Text Buffers
An important architectural pattern for most applications is the Model-view-controller pattern where we divide up our program into three parts:
- A model that is the core “engine” that drives the program.
- A view that renders the model to the user.
- A controller that allows the user to manipulate the model.
The core engine of a text editor is a text buffer, a sequence of characters, with operations specific to text editing. In particular, we don’t expect to insert text into arbitrary positions of the buffer. Instead, our operations on the text buffer revolve around the position of the cursor of our text editor, which we maintain as a piece of state alongside the character sequence. We can insert and delete characters at the cursor. Additionally, we can move the cursor forwards and backwards in the buffer.
For example, consider editing the text Hello world! with the cursor at the end of the buffer.
We might represent this state as follows:
Hello world!▮
Where the ▮ character captures the location of the cursor.
Depending on the text editor you use, the cursor may be rendered differently.
For example, it might be a vertical bar (|) between characters such that inserted characters appear to the right of the bar, and deletions remove characters to the left of the bar.
For consistency’s sake, we’ll take the stance that the cursor position is:
- The index where text is inserted.
- One index to the right of where text is deleted.
In our above example, this means that the cursor position is index 12 of the string.
With this in mind, if we type the characters abc into our editor, we expect the buffer to change with each keystroke as follows:
  Hello world!▮
⇒ Hello world!a▮
⇒ Hello world!ab▮
⇒ Hello world!abc▮
We can move the cursor to the left and right of the buffer, one position a time. For example, moving the cursor left nine times results in the following changes:
  Hello world!abc▮
⇒ Hello world!ab▮c
⇒ Hello world!a▮bc
⇒ Hello world!▮abc
⇒ Hello world▮!abc
⇒ Hello worl▮d!abc
⇒ Hello wor▮ld!abc
⇒ Hello wo▮rld!abc
⇒ Hello w▮orld!abc
⇒ Hello ▮world!abc
Now, insertions and deletions occur in the middle of the buffer.
After deleting six times and then inserting the character !, the state of our buffer becomes:
  Hello ▮world!abc
⇒ Hello▮world!abc
⇒ Hell▮world!abc
⇒ Hel▮world!abc
⇒ He▮world!abc
⇒ H▮world!abc
⇒ ▮world!abc
⇒ !▮world!abc
At this point, the buffer contains the contents !world!abc and the cursor is at index 1 so that subsequent insertions happen after the left-most exclamation mark.
In the project, we codify this data type with the Buffer interface.
Check out this interface and add Javadoc comments to all interface methods.
In the subsequent parts, we’ll implement this interface in two different ways!
Part 1: A Simple String Buffer
First, we will implement a simple text buffer whose backing data is a Java String.
The cursor in this setup is simply an index in the range where is the current size of the buffer.
Note that the cursor is an essentially an index into the backing String except it can be one character past the last valid index, so that text insertion can occur onto the end of the buffer.
Inside SimpleStringBuffer.java, you’ll find stubs for the following constructor and methods.
You should implement them all and provide appropriate Javadoc comments for each:
SimpleStringBuffer(): constructs a new, emptySimpleStringBuffervoid insert(char ch): inserts characterchinto the buffer at the cursor’s current position, advancing the cursor one position forward.void delete(): deletes the character at the cursor’s current position, moving the cursor one position backwards. Does nothing if there are no characters in the buffer.int getCursorPosition()returns the current position of the cursor.void moveBackwards()moves the cursor one position backwards. The cursor stays put if it is already at the beginning of the buffer.void moveForwards()moves the cursor one position forwards. The cursor stays put if it is already at the end of the buffer.char getChar(int i)returns theith character of the buffer, zero-indexed. Throws anIndexOutOfBoundsExceptionifiis an invalid index into the buffer.String toString()returns the contents of the buffer as aString.
When you are done, you should also write a unit test suite for SimpleStringBuffer in SimpleStringBufferTests.java (found in the src/test/... folder of the project).
Since all the methods in SimpleStringBuffer are interrelated, it is most fruitful to write unit tests at the level of the whole class rather than individual methods.
Each unit test should cover a scenario of operations on the buffer, e.g., the transcript of edits in the Background section.
Your completed unit test suite should ultimately:
- Exercise all methods of
SimpleStringBuffer. - Cover both normal and corner cases of the buffer.
In addition to your unit test suite, use Jqwik to write at least one property-based test for the buffer. Your property can be any property that ought to be true of the buffer over arbitrary characters and integers.
Part 2: Analyzing the Simple String Buffer
As we have discussed previously, strings in Java are immutable, i.e., they cannot be modified once created.
Any operations over strings, e.g., string concatenation and substring, generate new strings that copy the data from their inputs.
Review your SimpleStringBuffer implementation in light of this fact.
You should note that, perhaps, using a String as the backing data structure for your buffer may be highly inefficient!
In the appropriate section of README.md analyze the runtime of the insert method of SimpleStringBuffer to demonstrate this inefficiency.
Make sure to provide:
- The relevant input(s) to the method.
- The critical operation(s).
- A mathematical model of the runtime of
insertas a function of the inputs and operations you chose. - A Big-O characterization of the model, i.e., “
insertis .”
You should include a paragraph justifying your model, explaining the different operations that insert performs and how they contribute to the runtime.
(Hint: in your justification, you should appeal to the fact that Java strings are immutable and the consequences of this design decision in some fashion!
In particular, what must the runtime of string concatenation (+) be if strings are immutable?)
Part 3: Gap Buffers
It should be clear at this point that we need an alternative data structure to back our text editor! In this part, you’ll implement a gap buffer, an array-based sequence that allows for efficient insertion and deletion at the cursor point!
A gap buffer maintains a singular array broken up into three parts:
- The text before the cursor.
- An empty gap that new characters can be inserted into.
- The text after the cursor.
For example, imagine that our text editor contains the text Helloworld! and the cursor is positioned between the ‘o’ and the ‘w’.
Our gap buffer would represent this with the following array:
 0                  10
-------------------------------
|H|e|l|l|o| | | | |w|o|r|l|d|!|
-------------------------------
           ^       ^
The text before the cursor is Hello and the text after the cursor is world!, so these characters appear to the left and right of the array, respectively.
In between the two chunks of text is the gap, a portion of the array empty space that will be filled with newly inserted characters.
The key invariant of the gap buffer is that these three sections always appear in this order:
In a gap buffer, the text before the cursor, the unused gap, and the text after the cursor always appear in this order.
Our implementation of the various text buffer operations must maintain this invariant! To do this, the gap buffer must explicitly track where the gap is in the overall buffer. There are several ways to do this; we recommend tracking the starting index of the gap and the first index of the after-cursor text. These are indices 5 and 9 of the array above, respectively.
To demonstrate how the gap buffer operates, we’ll walk through the canonical operations of a text editor and show how the data structure evolves over time. From these examples, you should extrapolate how insertion, deletion, and cursor movement works with this data structure.
Inserting abc.
 0                  10
-------------------------------
|H|e|l|l|o| | | | |w|o|r|l|d|!|
-------------------------------
           ^       ^
-------------------------------
|H|e|l|l|o|a| | | |w|o|r|l|d|!|
-------------------------------
             ^     ^
-------------------------------
|H|e|l|l|o|a|b| | |w|o|r|l|d|!|
-------------------------------
               ^   ^
-------------------------------
|H|e|l|l|o|a|b|c| |w|o|r|l|d|!|
-------------------------------
                 ^ ^
Insertion proceeds straightforwardly (as long as there is space in the gap):
- Inserting the character at the start of the gap region and
- Moving the cursor to the next empty space of the gap.
Moving the cursor 3 spaces to the left.
 0                  10
-------------------------------
|H|e|l|l|o|a|b|c| |w|o|r|l|d|!|
-------------------------------
                 ^ ^
-------------------------------
|H|e|l|l|o|a|b| |c|w|o|r|l|d|!|
-------------------------------
               ^ ^
-------------------------------
|H|e|l|l|o|a| |b|c|w|o|r|l|d|!|
-------------------------------
             ^ ^
-------------------------------
|H|e|l|l|o| |a|b|c|w|o|r|l|d|!|
-------------------------------
           ^ ^
Observe how moving the cursor left (dually to the right) requires that we:
- Move the end character of the left section to the start of the right section.
- Update our cursor start and end points to reflect that the buffer has moved.
Delete 3 characters.
 0                  10
-------------------------------
|H|e|l|l|o| |a|b|c|w|o|r|l|d|!|
-------------------------------
           ^ ^
-------------------------------
|H|e|l|l| | |a|b|c|w|o|r|l|d|!|
-------------------------------
         ^   ^
-------------------------------
|H|e|l| | | |a|b|c|w|o|r|l|d|!|
-------------------------------
       ^     ^
-------------------------------
|H|e| | | | |a|b|c|w|o|r|l|d|!|
-------------------------------
     ^       ^
Like insertion, deletion involves removing the character to the left of the gap and moving the start index of the gap. Note that while I physically deleted the character in the example above, your code does not need to do this! Our invariant ensures that any values in the gap buffer are not being used, so they can be overwritten as needed. Thus, simply moving the start index of the gap buffer “deletes” characters implicitly!
Insert y.
 0                  10
-------------------------------
|H|e| | | | |a|b|c|w|o|r|l|d|!|
-------------------------------
     ^       ^
-------------------------------
|H|e|y| | | |a|b|c|w|o|r|l|d|!|
-------------------------------
       ^     ^
After inserting y, we arrive at the following array state.
Note that even though there is a physical gap in the array, that gap does not appear in our output!
So the result of calling toString on the buffer at this point should be: Heyabcworld!.
Expanding the Gap Buffer
There is only one major complication with the gap buffer: what happens if we fill the array?
-----------
|a|b|c|d|e|
-----------
     ^
     ^
In this situation, the buffer contains the text abcde and the cursor is located between the c and d (at index 2).
However, if we try to insert another character, we find that there is no room!
(Hint: how do we know this is the case from the gap buffer state?)
To alleviate this situation, we must perform a common operation over array-based lists: we must expand the array to make space! This involves two steps:
- Allocating a new array that is “significantly” bigger than the current array. We’ll justify this choice when we analyze the complexity of array lists later in the course, but for now, let us choose to double the array size every time we expand it.
- We copy over the elements from the old array to the new array. In the case of gap buffers, we want to ensure that the before-cursor text segment starts at the first index of the array and the after-cursor text segment ends at the end. The unused space between the two segments becomes our new gap!
For the example above, expanding the array results in the following updated buffer:
---------------------
|a|b| | | | | |c|d|e|
---------------------
     ^         ^
You should implement your gap buffer in GapBuffer.java.
Additionally, you should write a unit test suite and at least one property-based test for the data structure in GapBufferTests.java.
Note that SimpleStringBuffer and GapBuffer have the exact same methods!
So you should simply copy your tests for SimpleStringBuffer to GapBuffer as a starting point.
However, you should add additional tests to cover additional corner cases that might arise with the gap buffer, in particular, around array expansion.
Part 4: A Simple TUI
With the model of our text editor completed, now we’ll construct a very basic user interface to complete the application! We’ll use the cross-platform Lanterna library for creating cross-platform text-based UIs (TUIs). The beauty of Lanterna is that it exposes a single API that can target console-based or graphics-based TUIs, no matter what operating system you are on!
Lanterna is a third-party library, so we instruct Maven to download and integrate it into our build via the following dependency addition to pom.xml (already done for you):
<dependency>
  <groupId>com.googlecode.lanterna</groupId>
  <artifactId>lanterna</artifactId>
  <version>3.1.2</version>
</dependency>
Lanterna offers several levels of abstraction for writing to the terminal. It turns out that it’ll be most beneficial for us to operate of Lanterna’s screen which provides a “medium”-level access to the internals of the terminal.
Creating a screen object requires navigating a few classes of the Lanterna library:
- We first create a
DefaultTerminalFactoryobject which, as you might guess from the name, is responsible for making terminals! We can simplynewup aDefaultTerminalFactory()withnew DefaultTerminalFactory(). - The
DefaultTerminalFactoryobject has a method,createScreen()that creates a screen tied to a (default) terminal window.
We can do these two steps as follows:
// At the top of your file...
import com.googlecode.lanterna.terminal.DefaultTerminalFactory;
import com.googlecode.lanterna.screen.Screen;

// ...

DefaultTerminalFactory factory = new DefaultTerminalFactory();
Screen screen = factory.createScreen();
The import statements allow us to reference the DefaultTerminalFactory and Screen classes from the Lanterna library.
More specifically, once we have included the library in our build (via the pom.xml declaration), we can always reference DefaultTerminalFactory and Screen using their fully-qualified names, i.e., their names prepended with their full package paths:
com.googlecode.lanterna.terminal.DefaultTerminalFactory factory =
    new com.googlecode.lanterna.terminal.DefaultTerminalFactory();
It should go without saying, but using the fully-qualified names for classes is usually undesirable!
Thus, we will usually use import statements to cut down on this verbosity.
Tip
importstatements can be annoying to add to your code. Without additional assistance, you would need to keep a copy of the library’s documentation open and search for where relevant > classes are located, so that you can plug in the relevantimportstatements.However, modern IDE like VSCode (with the standard Java extensions) can do this for you! If you type
DefaultTerminalFactory = new DefaultTerminalFactory()you should receive an error—displayed as a red or yellow squiggle underneathDefaultTerminalFactory. If you hover over this squiggle, you should receive a prompt to access hints for potentially fixing the error. In NetBeans, the hotkey to access hints for an error is alt-enter; in VSCode, it is either ctrl-space (Windows and Linux) or command-space (Mac). With yourpom.xmlfile correctly configured, your IDE is smart enough to search relevant libraries, find an entry for DefaultTerminalFactory in the Lanterna library and offer the suggested fix to add the relevantimportstatement! Feel free to use this shortcut for any classes that requireimportstatements in your code!
Note that we’ll never use the DefaultTerminalFactory after making the screen!
Thus, it is more idiomatic to get rid of the intermediate factory local variable and combine everything onto one line:
Screen screen = new DefaultTerminalFactory().createScreen();
Note that screen throws an IOException, so you will need to add a throws IOException clause to main’s method signature.
Rendering
Once we have access to a screen object, the following methods will be useful for writing to the terminal:
screen.clear()clears the screen.screen.startScreen()initializes the state ofscreenso that it is ready to render text.screen.stopScreen()cleans up thescreenand its underlying terminal, so that it is ready to be used by other programs. This method must be called after you are done with thescreenbut before the program exits!screen.refresh()moves the contents of screen’s back-buffer to its front-buffer. It turns out the screen maintains two views of the terminal, a visible front-buffer and a back-buffer. All writes to the screen are first applied to the back-buffer and are not visible untilscreen.refresh()is called. This allows the library to provide asetCharactermethod that takes arowandcolversus being constrained to input text only at the terminal’s cursor.screen.setCharacter(int row, int col, TextCharacter ch)prints characterchto position(row, col)to the screen’s back-buffer. To create aTextCharacterfrom a regularchar, you can use theTextCharacter.fromCharacter(char ch)static function of theTextCharacterclass.screen.setCursorPosition(TerminalPosition pos)sets the cursor to the given position in the back-buffer. Note that sincesetCharacterallows you to write characters at arbitrary positions of the screen, this method is purely cosmetic. It causes the terminal to render the cursor at the given position. TheTerminalPositionclass provides a two-argument constructor,new TerminalPosition(int row, int col), that you can provide tosetCursorPosition.
Because of the back-buffer/front-buffer nature of the screen object, it’ll be useful to write a helper method drawBuffer(GapBuffer buf, Screen screen) that clears the screen and then renders the entire GapBuffer to the given screen, calling screen.refresh() to update the display.
Lanterna takes care to only render the difference between the back-buffer and the front-buffer, making this “full screen refresh” style of rendering as efficient as possible.
Input-Output
To perform input-output with the screen object, you can use screen.readInput() to grab a KeyStroke from the keyboard.
Note that readInput() waits for the user to press a key before returning.
The KeyStroke object has two important methods to determine what key was pressed:
stroke.getKeyType()returns aKeyTypeobject that you can check (via theequals()method) to see what kind of key was pressed. Important for our text editor are the key types:KeyType.Characteris the type of keys that correspond to characters.KeyType.ArrowLeftis the left arrow key.KeyType.ArrowRightis the right arrow key.KeyType.Backspaceis the backspace key.KeyType.Escapeis the escape key.
stroke.getCharacter()returns thecharcorresponding to the key pressed if the key type isKeyType.Character.
Your text editor should respond to key presses as follows:
- Characters are added to gap buffer.
- The backspace key deletes from the gap buffer.
- The arrow keys move the cursor.
- The escape key exits the program.
To accomplish this, you’ll want to set up a loop in main that repeatedly processes screen.readInput() calls until escape is pressed.
You can then use your drawBuffer function at the end of each iteration of the loop to render whatever changes the keystroke made to the buffer:
boolean isRunning = true;
while (isRunning) {
    KeyStroke stroke = screen.readInput();
    // TODO: Process the key stroke!
    drawBuffer(buf, screen)
}
File Input/Output
Finally, you’ll want your text editor to read from and write to files! More specifically, the program takes a file as input. The contents of the file (if it exists) become the initial contents of the editor. When the program exists, the contents of the text editor are written to the file (overwritten if it already exists or newly created if it didn’t exist).
Luckily, in modern Java, these behaviors are pithy one-liners thanks to the “new I/O” (java.nio) package of the standard library!
There are two relevant static methods of the Files class for reading and writing the contents of a file as a String:
Files.readString(Path path)returns the contents of the file specified by the givenpathas aString.Files.writeString(Path path, String contents)writescontentsto the file specified the givenpath.
To create a Path, you can use the static Paths.get(String path) function which creates a Path object from a String representing a path.
You can check whether the path points to a valid file (and not a directory) with a combination of two methods:
Files.exists(Path path)returns true if and only ifpathpoints to a valid file or directory on disk.Files.isRegularFile(Path path)returns true if and only if thepathin question points to a file (and not a directory).
If the path given to the text editor does not exist, then the text editor is loaded with an empty buffer.
Note that Files.writeString will overwrite an existing file or create a new file if it does not exist already, so there is no need to do any checks as you write the file to disk and exit the program.
Exploring Generics
In today’s lab, we’ll explore how generics can both help us:
- Write less redundant code.
- Capture in a machine-checkable fashion that our code frequently doesn’t care about the identity of the values it manipulates.
To begin, feel free to template-copy the following Github repo to your personal account:
And clone down a copy of your repo to your local machine. Additionally, also add your partner as a collaborator to the repository on your personal Github account (Settings → Collaborators), so they can have access to your work when you are done!
For this lab, we will focus on the code found in the edu.grinnell.csc207.generics package.
Part 1: Generic Linked Lists
The generics package contains two implementations of our linked list data structure, one specialized to integers (LinkedListInt) and one specialized to strings (LinkedListString).
Use generics to write a generic LinkedList class that makes the specialized versions unnecessary.
Additionally, the current project includes a test suite for both LinkedListInt and LinkedListString.
Create a new test suite LinkedListTests that unifies the two test suites into a single test suite that adequately covers your generic LinkedList class.
Importantly, your LinkedListTests suite should be minimal in the sense that you include only the tests necessary to fully cover all possible cases of LinkedList.
You should take advantage of the fact that within a generic class or method, the code cannot presuppose anything about the potential instantiations of its type variables.
Part 2: Generic Array Lists
generics also contains an implementation of array lists specialized to ints in the ArrayList class.
Modify this class so that it is generic in the type of elements the list holds.
Copy your fully pruned LinkedListTests file to a new ArrayListTests file to ensure that everything works.
(Note: at this point, you should be able to search-and-replace LinkedList to ArrayList in the file!)
Part 3: The List Interface
Now, let’s unify the two generic list implementations so that they can share the same test suite!
Write a (generic) interface in the generics package called List<T> that your generic LinkedList<T> and ArrayList<T> classes can implement.
Once you have implemented this interface, try simplifying your test suite similarly.
Write a new testing file called ListTest that tries to reduce code redundancy in your suite as much as possible!
Part 4: Generic List Operations
Choose either of your list classes and attempt to implement each of the following methods for that class.
You do not have to add the methods to the List<T> interface or implement them in the other list class.
Note that because of the nature of generics, you may find yourselves unable to implement the method in question.
If so, have the method throw a UnsupportedOperationException:
throw new UnsupportedOperationException();
And in the method’s Javadoc comment, explain why the method cannot be implemented.
-
void intersperse(T sep): insertssepin between each element of this list. -
T maximum(): returns the maximum element found in the list. -
String toString(): returns a string representation of the list in the form:[x1, x2, ..., xk]wherex1,x2, …,xkare the elements of the list. -
void insertionSort(): sorts this list using the insertion sort algorithm. Insertion sort proceeds by looping over the elements of the array, maintaining the following invariant:[ <sorted region> | <unsorted region> ] ^ iIn other words, the left-hand side of the array consists of the first
ielements of the array in sorted order.iis the index of the first element of the right-hand side of the array which is the unsorted region of the array. Insertion sort maintains this invariant by taking theith element and inserting it into the sorted region in sorted order.
Additional Practice: The Optional Data Structure
Now, let’s design a new data structure, the Optional datatype that addresses a common problem found in Java: null pointers.
While Java does not explicitly have pointers, since any reference type can be null, the null value is frequently used to quickly denote that “nothing” has been returned, usually due to some erroneous condition being met.
However, this design choice frequently leads to spurious NullPointerExceptions that are difficult to track down and diagnose.
This problem is so bad that computer scientist Sir Tony Hoare, the creator of the null reference calls it his “billion-dollar mistake” for all the damage to the software industry null pointers have caused!
4.1: Why Optional?
First, let’s explore where using null references can lead to ruin.
As a simple example, consider the HashMap class which efficiently implements a dictionary-style data structure, mapping keys to values.
A critical method of this class is V get(K key) which given a key value of type K returns the value of type V associated with that key.
Review this method’s documentation to see how it uses null:
Brainstorm a list of the potential problems that get’s usage of null can produce in our programs if we aren’t careful.
Check with a member of the course staff before continuing!
4.2: The Optional Class
We can alleviate the problems you identified in the previous part by defining a new type that makes it explicit that a value may be present. In effect, this type is a small “sequential” data structure that either holds zero or one element!
The Optional class in the standard library fulfills the purpose, and for this part of the lab, we’ll replicate the basic functionality of Optional to see how this little class works.
Complete the definition of Optional in the lab as follows.
First, add no-argument constructor private Optional() that does nothing.
This seems odd, but what we are doing with this is restricting how an Optional value can be created.
We’ll force the user to create an Optional through a pair of static generic methods that you should implement:
static <T> Optional<T> empty()creates a new, emptyOptionalvalue.static <T> Optional<T> of(T value)creates a newOptionalvalue that containsvalue.
With these static functions in place, implement the following basic methods of the Optional class:
boolean isEmpty()returnstrueiff thisOptionaldoes not have a value.boolean isPresent()returnstrueiff thisOptionalhas a value.T get()returns the value held in the optional or throwsNoSuchElementExceptionif the value is not found.T orElse(T other)returns the value held in the optional orotherif theOptionalis empty.
Refactoring with Inheritance
In this lab, we’ll practice using inheritance to refactor code to avoid code duplication.
Consider the Employee interface found in edu.grinnell.csc207.inheritance and associated classes that represent employees in an organization.
Using inheritance, refactor this code to eliminate redundancy while capturing the hierarchical nature of the employee structure.
The Sounds of Sorting
(This assignment is inspired by the work of Timo Bingmann and Casey Rule!)
In this assignment, we will build both a visualizer and audibilizer for the various sorting algorithms that we implemented during the week.
You can access the Github repo for this assignment here:
Note that for this week’s labs/project, you’ll only turn in this repository!
Part 1: Sorting Algorithms
First, we will implement a number of sorting algorithms over generic arrays as discussed in class. The sorting algorithms you need to implement and subsequently instrument in the next part are:
- Selection Sort
- Insertion Sort
- Bubble Sort
- Merge Sort
- Quick Sort
You can copy your implementations of these sorting algorithms from the sorts lab into Sorts.java as a starting point.
Note that the signatures of these sorting algorithms have changed from the sorts lab.
This is to account for the event logging that we will implement in the next step!
Part 2: Instrumenting Our Sorting Algorithms
In order to visualize and audibilize our sorting algorithms, we must instrument our sorting algorithms so that we can see how they mutate the input list at each step. There are various advanced techniques for doing this, e.g., callbacks or continuations. For this project, we will simply log the interesting operations that our sorting algorithms perform and store them in a list for playback later.
We’ll represent these possible sorting events as a collection of classes united by a common interface.
This interface is SortEvent<T> which represents a sort event over a generic list of Ts.
The SortEvent<T> interface possesses the following methods:
void apply(T[] arr): applies this sort event to the given array.List<Integer> getAffectedIndices(): returns a list containing all the indices that this event affects.boolean isEmphasized(): return true if this event should be emphasized by the visualizer/audibilizer.
There are three kinds of events to implement:
- Compare Events that are logged whenever an algorithm compares two elements of the array. Compare events are not emphasized, and their affected indices are the indices of the elements being compared. Applying a compare event does nothing to an array.
- Swap Events that logged whenever an algorithm swaps elements of the array. Swap events are emphasized, and their affected indices are the indices of the elements being swapped. Applying a swap event swaps the recorded indices of the array.
- Copy Events that fire whenever an algorithm copies an element into an index of the array. Copy events are emphasized, and the affected index is the destination of the copy. Applying a copy event performs the copy of the recorded value into the array, overwriting the value
You should complete the definitions of the three classes, CompareEvent<T>, SwapEvent<T>, and CopyEvent<T> found in the events package by having them implement the SortEvent<T> interface and the behavior described above.
To instrument your sorting algorithms:
- Implement the
SortEvent<T>class hierarchy. - Augment your sorting algorithms in
Sorts.javaso that they create and return a list ofSortEvent<T>objects that capture all the events that the given algorithm generates.
To test whether your event logging is correct, you should implement one last sorting algorithm found in Sorts.java:
<T> void eventSort(T[] l, List<SortEvent<T>> events), : given an array ofTs and list ofSortEvent<T>objects, apply those events to the list in-order.
The test suite for the project has been enhanced to take the events generated from your sorting algorithms and also run eventSort on a copy of the original array and ensure that the generated events also sort that copy.
The Remainder of the Program
With the engine of the program completed, you can now enjoy your sorting audibilizer/visualizer! For reference, here are the remainder of the files and their contents. We encourage you to read through the code to understand how a more complicated program like this is put together.
Main.java: the entry point of the program.ArrayPanel.java: the portion of the GUI that renders the note indices to the screen.ControlPanel.java: the portion of the GUI that contains widgets to control the program.Scale.java: an object that encapsulates a musical scale represented by a collection of MIDI notes.NoteIndices.java: an object that encapsulates a collection of indices into a particular Scale object.
Sorts
Today’s lab is pretty straightforward, you’ll implement a variety of generic sorting algorithms as a rite of passage in sequential structure design.
Make a new repository from the following template to get started!
Trees
Today, we will explore how to implement hierarchical structures, trees, in Java.
Setup
Create a new lab repository for this week using our template for Maven-based Java projects.
You should use this template repository to create a new repository on your account, giving the repo an appropriate name for this week’s work, e.g., trees.
Once you have created and locally cloned your repository, add the following files, taking care to ensure that you add them to folders consistent with their declared packages, edu.ttap.trees.
(Recall that regular source files go under the src/main/java path and test files go under the src/test/java path.)
Part 1: Contains
First, let’s implement a basic recursive operation over a tree from scratch.
Tree.contains(T v) returns true if and only if (iff) v is contained within the given tree.
- Give an algorithmic description of
containsbased on the recursive definition of a binary tree. - Translate that description into an implementation for the
containsmethod and verify that your implementation works for the tests found inTreeTests.java.
Part 2: Traversals
In the reading, we discussed three different kinds of traversals: preorder, in-order, and post-order traversals. The reading describes them as follows:
- A preorder traversal “visits” the value at the node, the left subtree, and then the right subtree.
- An in-order traversal “visits” the left subtree, the value at the node, and then the right subtree.
- A post-order traversal “visits” the left subtree, the right subtree, and then the value at the node.
First, start with in-order traversals:
- Write down a description of the preorder traversal algorithm using the recursive definition of a binary tree, i.e., in terms of leaf and node cases.
- Implement
Tree.toListInorder()based on this description. (Hint: your recursive helper function will take an additional argument, a list that you will add the elements into. This list should initially be empty.) - Verify that your implementation passes the tests.
After you do this:
- Adapt your algorithmic description of in-order traversal to preorder and post-order traversal. Specifically, how does the description change based on which traversal you are specifying?
- With this insight, implement
Tree.toListPreorder()andTree.toListPostorder(). You should find that implementing these methods are trivial provided you have implementedtoListInorder()correctly! Make sure that your code passes all tests!
Part 3: Stringifying Trees
Now, let’s implement a recursive operation that requires some additional case work. Recall that when we wrote a pretty printing function for an array, we (essentially) needed a special case for the first element of the list. This is because a comma-separated list of elements only has commas.
import java.util.StringBuffer;

public static void arrayToString(int[] arr) {
    StringBuffer buf = new StringBuffer("[");
    if (arr.length > 0) {
        buf.append(arr[0]);
        for (int i = 1; i < arr.length; i++) {
            buf.append(", ");
            buf.append(arr[i]);
        }
    }
    buf.append("]");
    return buf.toString();
}
Observe how in arrayToString we treat the first element of the array specially (i.e., add it to the string without a comma).
Every other element v in the array can then be appended as ", v".
Also note how we use a StringBuffer rather than naive string concatenation to avoid the classic time complexity problem associated with incrementally building an immutable string.
Adapt this approach to implement Tree.toString() which returns a String representation of the elements of tree in a linearized form: [v1, ..., vk].
To do so, you should treat the “first” element of the tree, i.e., the root, specially, similar to the first element of the array in arrayToString.
- Give an algorithmic description of
toStringbased on the recursive definition of a binary tree. - Modify the test for calling
toStringon the example tree based on how you predict yourtoStringmethod will behave. - Translate that description into an implementation for
toStringmethod and verify it passes the tests.
For Additional Practice: Pretty Printing
Observe that our toString method linearized the tree, losing its hierarchical structure.
This is convenient for a quick implementation, but we might want to visualize the hierarchical structure within a tree.
We can use a bulleted-list style representation where we use indentation and sub-bullets to capture parent-children relationships.
For example, we might visualize our example tree in this style as follows:
- 5
  - 2
    - 1
    - 3
  - 8
    - 7
      - 6
    - 9
      - 10
Write a method toPrettyString() that returns a string representation of a tree in this format.
(Hint: you will need to keep track of the indentation level in your recursion. This amounts to including an extra parameter in your recursive helper function!)
Binary Search Trees
Today, we will extend the Binary Search Tree implementation found in the reading with traversal and deletion methods.
Setup
Add the following files to your lb repository, taking care to ensure that you add them to folders consistent with their declared packages, edu.ttap.bsts.
(Recall that regular source files go under the src/main/java path and test files go under the src/test/java path.)
Review: Binary Search Trees
Recall that a binary search tree (BST) is a binary tree defined recursively as either:
- A leaf containing no data or
- A node containing a datum, left subtree, and right subtree.
Furthermore, every node of a BST satisfies the binary search tree invariant:
Let be the value at the node. Then every value found in the left subtree of this node is less than . And every value found in the right subtree of this node is greater than or equal to .
Before going to implementation, we define our recursive operations over trees directly in terms of this definition. For example, the size of a BST is either:
- if the BST is a leaf.
- where and are the sizes of the left and right subtrees is the BST is a node.
Part 1: Insertion
In the reading, you were tasked to visualize the step-by-step evolution of a binary search tree when adding the values 3, 5, 2, 6, and 4.
- Check your work on this question with your partner.
- Next, review the implementation of
BinarySearchTree.insertand its associated helper method from the reading. Make sure that you understand howinserttakes advantage of the BST property to perform insertion. Ask a member of the course staff if you have any questions. - Port the implementation of
BinarySearchTree.insertfrom the reading to your lab and complete the definition ofmkSampleTreefound inBinarySearchTreeTest.javaby callinginsertto add the values 3, 5, 2, 6, and 4 to the tree (in this order). Make sure that thesizetests pass!
Part 2: Contains
Last class, we implemented the contains(T v) method of a tree that returns true if and only if (iff) v is contained within the given tree.
Let’s implement this method for our binary search tree, taking advantage of the BST property to search more efficiently.
- Give an algorithm description of
containsbased on the recursive definition of a binary search tree. - Translate that description into an implementation for the
containsmethod, verifying that your implementation passes the unit
Part 3: Ordered Traversal
Last class, we talked about the three traversal methods for trees: preorder, in-order, and post-order traversal. Thanks to the binary search tree property, one of these methods is especially beneficial to implement whenever we traverse a BST.
Discuss with your partner which traversal strategy produces an ordered result and use that implementation strategy to implement:
BinarySearchTree.toString()BinarySearchTree.toList()
Observe that these traversal methods do not depend on our tree being a binary search tree, so you should be able to port your implementations from the previous lab unmodified!
Part 4: BST Sorting
Next, let’s take advantage of the BST property in a more direct way!
With toList() implemented, implement BinarySearchTree.sort(List<T> lst) which takes a list lst as input and returns a list containing the elements of lst in sorted order.
Make sure the relevant tests found in BSTTests.java pass!
Additionally, analyze the runtime of sort assuming that the series of insertions produces a reasonably balanced binary tree.
Include your runtime in your comment for sort.
Part 5: Deletion
Finally, let’s tackle a more complex function: deletion! Deletion is a non-trivial operation to implement for a binary search tree because of the need to preserve the binary search tree invariant. As a starting exploratory problem, consider the following binary search tree:
        5
       / \
      /   \
     /     \
    2       15
   / \     / \
  1   3   10  17
         / \   \
        7   12  20
            /
           11
Now imagine deleting the element 15 from the tree.
While multiple trees are possible, draw a binary search tree that could result from the deletion of 15 that minimizes the movement of elements in the tree.
Once you have done this, you can see that deletion is inherently more complicated than any other operations we’ve discussed previously! This is because deletion potentially results in non-local changes to the tree, i.e., changes that involve more than a parent and its immediate children.
Part 5.1: Deletion Cases
For these more complicated tree operations, it is useful to break up the critical operation into cases. Finding the node to delete is a simple traversal, but actually performing the deletion can be difficult! Thus, we’ll assume that we are in the following situation:
    v
   / \
left  right
We have found the element that we want to delete v and v’s corresponding node has a left and right subtree.
Our goal is to return a new subtree that is the result of deleting v from the tree.
We can break up this operation into three cases, two of which are easy to implement, based on the contents of left and right.
Create and explore a variety of small, concrete examples of this situation to determine these three cases and write them down in your source file.
Check with a member of the course staff to ensure you have identified the appropriate cases!
Once you have verified you are correct, you can partially implement delete to, first, find the value of interest in the tree and then implement the two easy cases, leaving the third unimplemented.
Make sure to test these easy cases before moving on!
Part 5.2: The Hard Case
Now, let’s explore what to do in this final case by exploring some examples. Similarly to the beginning of this lab, try to carry out the deletion operation on the following sequence of trees, minimizing the amount of movement of the values in the tree.
Deleting 10:
  5
 / \
2   10
   / \
  7   12
Deleting 12:
  5
 / \
1   12
   / \
  7   15
 /
6
Deleting 15 (this is the example from the beginning of the lab!):
        5
       / \
      /   \
     /     \
    2       15
   / \     / \
  1   3   10  17
         / \   \
        7   12  20
            /
           11
Try to generalize these three examples into a general algorithm for deleting nodes in this final, third case. (Hint: the algorithm essentially involves finding, swapping, and deleting elements. The deletion can be performed recursively, but you should observe that the deletion will always be one of the two trivial cases!)
Check with a member of the course staff to ensure your algorithm is correct and, if it is, go ahead and implement it, adding sufficient tests to ensure that deletion works in all cases!
Grin Decompression
A Huffman Code is a scheme for lossless compression of data. Invented by David Huffman while he was a student at MIT, Huffman codes are a relatively simple and open compression technique used in a variety of commonly-used programs and file formats, e.g., various “zip” programs—gzip, pkzip, and bzip2—and image formats like jpegs and pngs. For us, they serve as a real-world example of trees in action! In this homework, we’ll write a program to encode and decode files in the .grin format, a simple compressed file format designed for this assignment. The core of a .grin file is an encoding of the file using Huffman’s algorithm.
Source Files
Add the following files to your lab repository for the week.
You should add these source files to the src/main/java/edu/ttap/compression directory as they exist in the edu.ttap.compression package:
Background
Data Compression with Huffman Codes
The key insight behind compressing data whether it is text, music, images, or any other file on our system is that there are patterns in our data that we can discover and represent more concisely. For now, let’s constrain our view to text files to simplify the discussion, although our final program will work over any file type. Recall that all data in our program are ultimately represented in bits, sequences of zeros and ones. Characters are no different; as we know, we represent characters as a number indicating its character value as dictated by some standard, e.g., the ASCII standard which assigns a value in the range 0-255 (a byte or 8 bits) to each character.
Consider the following simple text file:
a ab bza
The character values and the binary encodings for each character of this file are:
| Character | Value | Binary Rep. |
|---|---|---|
'a' | 97 | 01100001 |
' ' | 32 | 00100000 |
'b' | 98 | 01100010 |
'z' | 122 | 01111010 |
Note that the binary representation of the values is simply the character value in binary using 8 bits (as dictated by the ASCII standard). The binary representation of this file is the concatenation of all the binary representations of the characters in sequence:
01100001 00100000 01100001 01100010 00100000 01100010 01111010 01100001
There are actually no spaces in this bit-level representation of the file. I added them to make it clear where each character began and ended.
We dedicate 8 bits to each character to cover the complete range of possible character values, but clearly the above example does not benefit from this as it only uses four characters! Because of this, we could choose to represent the character much more concisely, e.g., using the following file-specific encoding of the characters in the file:
| Character | Huffman Code |
|---|---|
'a' | 11 |
' ' | 00 |
'b' | 10 |
'z' | 010 |
eof | 011 |
We introduce one extra special character, an end-of-file marker—eof—to tell us when the file ends.
Shorter codes are assigned to more frequently used characters, e.g., 'a' and space, and longer codes are assigned to less frequently used characters (e.g., 'z').
With this representation of the characters, we obtain the following compressed binary file (spaces again inserted for readability):
11 00 11 10 00 10 010 11 011
Even with the additional eof character, note the savings in size.
We went from a file of bits to a compressed file containing a payload of only bits!
The choice of these codes is not arbitrary—these are precisely the codes that the Huffman tree produces for this particular text file! In particular, these codes have an important property: no code is a prefix of another code. Because of this, recovering the original data given the mapping from characters-to-Huffman codes is easy: we simply walk the compressed binary file from left-to-right and once we encounter a valid code, we replace it with its corresponding character.
Huffman Trees
The key data structures in storing these character codes is the Huffman tree. A Huffman tree is a binary tree consisting of:
- Leaves that store a single character per leaf
- Nodes that do not store data but always have two children.
Let’s look at an example of such a tree for our example above. For now, we’ll assume that we are given a valid Huffman tree to work with. We will show how to create such a tree later!
                  [*]
                 /   \
          -------     ------
         /                  \
       [*]                  [*]
      /   \                /   \
   [' ']  [*]           ['b'] ['a']
         /   \
      ['z'] [eof]
This Huffman tree encodes the Huffman codes for each of the characters present in the file. To derive these codes, we simply walk from root to leaf for each character and record the path as a binary number where going left corresponds to 0 and right corresponds to 1. The codes for our characters are therefore:
| Character | Huffman Code |
|---|---|
'a' | 11 |
' ' | 00 |
'b' | 10 |
'z' | 010 |
eof | 011 |
Note that this isn’t the only possible set of Huffman codes for this file. Depending on how the priority queue resolves ordering between nodes with the same frequencies, we may arrive at a different, yet equally-efficient encoding.
Decoding with Huffman Trees
With our Huffman tree we can decode a file that was compressed using the tree’s codes. To decode a file, we repeatedly walk the tree from root to leaf, using the bits found in the encoded file as a guide. Whenever we hit a leaf, we output its correspond character, terminating the process once we reach the end-of-file character.
Using the tree we derived above to decode this file (written in its binary representation):
11001110001001011011
- We then read in 1 (right) and 1 (right) ending on a leaf that contains ‘a’; we output ‘a’. We reset our position back to the root of the tree and continue processing the binary file.
- We read 0 (left) and 0 (left) and output a ’ ’.
- We read 1 (right) and 1 (right) and output a ‘a’.
- We read 1 (right) and 0 (left) and output a ‘b’.
- We read 0 (left) and 0 (left) and output a ’ ’.
- We read 1 (right) and 0 (left) and output a ‘b’.
- We read 0 (left), 1 (right), and 0 (left) and output a ‘z’.
- We read 1 (right) and 1 (right) and output a ‘a’.
- We read 0 (left), 1 (right), and 1 (right) and terminate because we’ve encountered the end-of-file character.
The end result is the decoded string:
a ab bza
Which is what we started with!
Decoding Grins
An encoded file and its corresponding Huffman tree are stored in a particular file format we call a .grin file.
A .grin file has the following binary file format
[magic Number (32 bits)][serialized tree][payload]
|                                       |
-----------------------------------------
                     |
                   header
The portion of the file corresponding to the magic number and the serialized tree is called the header of the file. The payload is the actual compressed binary data.
The magic number or file signature is an integer (recall that integers are 32 bits) that denotes the type of data that this file contains. There is no standard behind this—it is simply a quick and dirty way for a program to check to see if a given file is in the format of interest. A List of common file signatures can be found on Wikipedia. For the .grin file format, the magic number is a single integer, 0x736, which is the (hexadecimal) encoding of 1846, the year that Grinnell College was founded. The other part of the header is dedicated to a serialized version of the Huffman tree that we can use to decode the payload.
Serialized Huffman Trees
In order to decompress a payload, we store the Huffman tree used to compress the file within the .grin file itself.
The tree is stored in a serialized, compact format.
Recall that we can serialize a binary tree, i.e., write it to a sequential structure such as a file, by performing a pre-order traversal of the tree.
When performing such a pre-order traversal, we serialize the tree as follows:
- If the node is a leaf, we write a
0bit and then 9 bits corresponding to the byte value stored at the leaf. - If the node is an interior node, we write a
1bit and then recursively write the left and right children of this node.
For example, consider our Huffman tree from before. Here, we label the interior nodes for explanatory purposes, but these labels do not appear in the serialized tree!
                  [A]
                 /   \
          -------     ------
         /                  \
       [B]                  [D]
      /   \                /   \
   [' ']  [C]           ['b'] ['a']
         /   \
      ['z'] [eof]
A pre-order traversal of the tree yields:
- The
[A]interior node. - The
[B]interior node. - The
[' ']leaf. - The
[C]interior node. - The
['z']leaf. - The
[eof, 1]leaf. - The
[D]interior node. - The
['b']leaf. - The
['a']leaf.
Keeping in mind that each of our byte values are represented by the following series of 9-bit values:
'a':001100001' ':000100000'b':001100010'z':001111010eof:100000000
Our serialization scheme yields the following compressed representation of our tree. Note that I’ve formatted the bit string so that it visually maps onto our pre-order traversal, but in reality, this would be a single sequence of 54 bits:
1
1
0 000100000
1
0 001111010
0 100000000
1
0 001100010
0 001100001
Deserialization of the tree from the .grin file simply reverses this process.
We read and interpret the bits of the serialized tree and reconstruct the tree, emulating a pre-order traversal in the process.
Implementation
The HuffmanTree Class
Your first—and most important task—is to write a class called HuffmanTree that captures the above process.
Your class should have the following constructor and methods:
HuffmanTree(BitInputStream in): constructs aHuffmanTreefrom the given file encoded in the serialized.grinformat described above.void decode(BitInputStream in, BitOutputStream out): Decodes a stream of Huffman codes from a file given as a stream of bits into their uncompressed form, saving the results to the given output stream. Note that the EOF character is not written tooutbecause it is not a valid 8-bit chunk (it is 9 bits).
Bit-level input and output is quite finicky in Java.
To help with this, we have provided two classes for you to use: BitInputStream and BitOuputStream
The relevant constructor and methods of the BitInputStream class are:
BitInputStream(String filename): constructs a newBitInputStreampointed at the given file.int readBit(): reads a single bit of data from the stream, returning -1 if the stream is empty.int readBits(int n): reads innbits of data (from 0 to 32 bits), returning -1 if the stream runs out of bits in the process.
Note that the return types of readBit and readBits are integers even though an integer is much larger than a single bit or byte (8 bits).
In particular, you should immediately cast the result of readBits to a primitive of the appropriate size.
The relevant constructor and methods of the BitOutputStream class are:
BitOutputStream(String filename): constructs a newBitOutputStreampointed at the given file.int writeBit(int bit): writes a single bit of data from the stream (0 or 1).int writeBits(int bits, int n): writesnbits of data to the stream (from 0 to 32 bits).
Both constructors of BitInputStream and BitOutputStream throw IOExceptions that you are free to handle using a try-catch block or a throws declaration on the relevant constructor and method signatures.
When designing the HuffmanTree, we identified two different types of nodes—leaf and (interior) nodes.
Rather than representing them with two separate classes related by an interface, we will instead use a single class, Node, to represent them.
In your Node class, add appropriate fields to support both a leaf and interior node.
Depending on whether the Node is a leaf or an interior node, you’ll selectively ignore some of the fields, e.g., a leaf does not have children and an interior node does not have a byte value associated with it.
The Grin Program
We tie everything into a single program, Grin.
Grin is a command-line program with the following syntax:
java Grin <infile> <outfile>
If grin is given invalid arguments, e.g., doesn’t provide exactly two arguments, then the program should report an error and exit.
Your main method should call out to the following static helper method of the Grin class that you should, in turn, implement:
void decode(String infile, String outfile): decodes the .grin file denoted byinfileand writes the output to the file denoted byoutfile.
Decode should perform the following operations in sequence:
- Open a
BitInputStreamto theinfile - Open a
BitOutputStreamto theoutfile - Parse the header of the
.grinfile. - Constructs a
HuffmanTreefrom the serialized version of the tree. - Decodes the payload using the Huffman Tree and the remainder of the stream, writing the results to the
outfile
If the infile is not a valid .grin file (i.e., the magic number is not correct), then decode should throw an IllegalArgumentException.
While the process of decoding has many steps, most of them are implemented in your HuffmanTree class.
On top of using the HuffmanTree class, you should write additional (static) helper functions within the Grin class to help factor out your code according to this outline.
Development
To exercise your Grin program, we have provided sample files as well as their encoded .grin files:
- The worked example from the beginning of the assignment:
- The Wikipedia article on Huffman Coding
- The Six Elements of a Liberal Arts Education (from the Grinnell Catalog)
- War and Peace by Leo Tolstoy (from Project Gutenberg):
You should place all eight of these test files in the files folder at the root of your repository.
You should then test your implementation again all four samples and ensure that you get the output that you expect.
To check the results of decoding, employ the following utilities:
- Use the Unix
diffutility to check that the original file is identical to the file produced after decoding the encoded file (i.e., round-tripping works). - Use the Unix
xxdutility with the-bflag to dump a file to its binary representation. This allows you to check that either a.grinfile or a plaintext file is laid out exactly as you expect.
Here some additional notes to aid you in development:
- You should not have to perform direct bit-level manipulation in this program (i.e., use the shift or logical bit operators).
All your bit operations should be performed through
BitInputStreamandBitOutputStream. - Most of the work is building the Huffman Tree! Don’t move onto the decoding phase until you are certain that you can construct a Huffman Tree correctly and use it to encode and decode files.
- Close your streams after you are done!
In particular, make sure to explicitly close your
BitOutputStreamas you are done with it so that any remaining bits that have not yet been written to the file are indeed written.
Maps
Today, we will explore how to implement the Map interface found in
Setup
Create a new lab repository for this week using our template for Maven-based Java projects.
You should use this template repository to create a new repository on your account, giving the repo an appropriate name for this week’s work, e.g., maps.
Once you have created and locally cloned your repository, add the following files, taking care to ensure that you add them to folders consistent with their declared packages, edu.ttap.maps.
Part 1: Association Lists
As a warm-up, we’ll explore how to implement the java.util.Map interface using the association list structure described in the reading.
Recall that an association list is simply a list of key-value pairs.
While simplistic, association lists are go-to implementations of maps for when you need a quick and dirty map and one is not easily available.
Implement the stubs found in AssociationList.java.
These include the following required interface methods:
void clear()boolean containsKey(Object key)boolean containsValue(Object value)V get(Object key)boolean isEmpty()V put(K key, V value)Set<K> keySet()V remove(Object key)int size()Collection<V> values()
You do not need to implement the Map’s entrySet, putAll.
Here some implementation notes to guide your development:
- You can use a standard library list implementation, e.g.,
ArrayList<T>, as your backing data structure for your map. - For
keySet, you can create ajava.util.HashSet<K, V>, populate it with the keys of your map, and return it. We’ll talk about what sets are very soon! - For
values, you can create any collection, e.g., anArrayList<T>, to store the values.
Part 2: Substitution Ciphers
Now, you’ll employ your association list implementation for a simple task: encrypting and decryption messages using substitution ciphers. A substitution cipher is a general form of cipher where we have a known mapping between characters. Encyption amounts to following the mapping in the “left-to-right” direction; decryption follows the mapping in the “right-to-left” direction.
For example, consider the following substitution cipher:
'a' -> 'i'
'b' -> 'g'
'c' -> 'w'
'd' -> 'o'
'e' -> 'h'
'f' -> 'z'
'g' -> 'f'
'h' -> 'a'
'i' -> 'k'
'j' -> 'n'
'k' -> 't'
'l' -> 'm'
'm' -> 'r'
'n' -> 'v'
'o' -> 'c'
'p' -> 'b'
'q' -> 'j'
'r' -> 'e'
's' -> 'y'
't' -> 's'
'u' -> 'l'
'v' -> 'd'
'w' -> 'p'
'x' -> 'u'
'y' -> 'q'
'z' -> 'x'
For the text "hello world", encryption yields the ciphertext "ahmmc pcemo".
Implement this functionality by completing the functions found in SubstitutionCipher.java.
SubstitionCipher expects three command-line arguments as input:
encyptordecryptdenoting whether the program should encrypt or decrypt the text.<ciphertext>the path to the file containing the cipher<text>the path to the file containing the text to either encode or decode
Each file of ciphertext contains one of the mappings of the cipher in the form k v where k is the original letter and v is the letter that should be substituted.
For example, here are the contents of the above cipher as a file for testing purposes:
Note that the plain text may have spaces in it! You should translate spaces as is rather than trying to encrypt/decrypt them.
Make sure that your SubstitionCipher program works on the following examples, all using example-cipher.txt:
-
Encrypting some text from the Wikipedia article on substitution ciphers yields:
kv i ylgyskslskcv wkbahe i elmh ky lyho sc waivfh hiwa mhsshe cz sah rhyyifh cvh is i skrh -
Decrypting some encrypted text from the same Wikipedia article yields:
theruleistoreplaceorsubstituteeachletterwithanotherletterfromthealphabet -
Round-tripping on the text
helloworld: helloworld-example.txt
Make sure that your program works on all three examples before you move onto the next lab!
Applying Integer Maps
In this lab, we’ll apply integer maps that count frequency of objects towards two different tasks: gathering statistics about text and sorting.
For this lab, write your code in a fresh, empty Java file IntegerMaps.java and put it in the edu.ttap.intmap package.
Part 1: Counting Letters
First, write a static method void reportCounts(String path) that prints to stdout the occurrences of each of the 26 English letters found in the text file found at path, one letter and its count per line, e.g. a: 205807.
You should consider the text in a case-insensitive manner and ignore any characters that are not English letters.
To maintain these counts, you should use an integer map.
(Hint: How can you map the English alphabet into the indices of this array?)
Try out your method on several books, e.g., books found on Project Gutenberg such as War and Peace by Leo Tolstoy:
Observe that the frequency of letters in English text is known. List each book that you use as a comment in your source file (with the URL you used to download the book) and in a sentence or two, describe whether the text is consistent with the known frequency of letters. If it isn’t, feel free to comment on why you think this is the case.
Part 2: Counting Characters
Your solution to part 1 is serviceable for the English alphabet, but does it scale up to handle arbitrary character sets?
Write a static method int countChars(String path) that reports the number of unique characters found in the text file located at path.
In addition, you should print out each character and its corresponding character value.
Because there will be many unique characters, you can print out all these pairs on a single line, separated by spaces.
For this exercise, you may use the Set interface and the TreeSet class from the standard library.
Unlike part 1, you should consider letters in a case-sensitive manner.
Based on your findings, can you apply the technique you developed in part 1 to count the occurrences of all these characters?
Try applying countChars to another book, e.g., Plato’s Republic,
Will your technique work with this book?
Part 3: The Letter Counter
One way we can resolve the difficulties you discovered in part 2 is to mod the character value by the length of the backing array. That way, every element has a proper index in the array. However, now we must account for collisions that occur between characters that map onto the same index.
Review the reading for this week and write a class called LetterCounter that maps arbitrary characters to integers.
You can create LetterCounter as a (non-public) class within IntegerMaps.java.
You class should support the following operations:
LetterCounter(): creates a new, emptyLetterCountermap.boolean hasKey(char ch): returns true iff this map contains an entry forch.void put(char ch, int v): associateschwithvin the map, overwriting the prior entry forchif it exists.int get(char ch): returns the value forchin the map if it exists; throws anIllegalArgumentExceptionifchdoes not have an entry in the map.
To resolve collisions, you should either use the probing or chaining methods described in the reading.
You may use the Pair class we developed last week along with other data structures from the standard library, in particular, lists.
You are, of course, not allowed to use maps from the standard library in your solution!
Use LetterCounter to rewrite reportCounts to report the counts of all characters found in the texts you tried in part 1.
Additional Problem: Linear Sorts
In the previous part, you maintained a mapping between characters and their frequency for the purposes of analyzing texts. Now, we’ll apply our “fast” integer maps for a different purpose: sorting! Recall that the time of our best sorting algorithms (mergesort and quicksort) were . Can we do better? It turns out we provably cannot do better with comparison-based sorts where our primary operation is comparing two elements relative to some ordering.
Let’s explore how integers maps can help us perform a sort without comparing elements, leading to a more efficient sorting algorithm (albeit with plenty of caveats).
Part A: Sorting from Frequencies
First, imagine that you are given an array of non-negative integers in the range 0 through 99, but you don’t know the contents. However, you are also given a mapping (implemented as an integer map) between the possible integers in the array and their frequencies. For each of the following sample frequency mappings A–C, sort the associated array (really, “give” the associated array, but sorted):
| Number | A | B | C |
|---|---|---|---|
| 0 | 1 | 3 | 0 |
| 1 | 0 | 0 | 2 |
| 2 | 0 | 2 | 0 |
| 3 | 1 | 5 | 0 |
| 4 | 0 | 0 | 2 |
| 5 | 0 | 0 | 0 |
| 6 | 1 | 0 | 0 |
| 7 | 1 | 0 | 2 |
| 8 | 1 | 2 | 0 |
| 9 | 0 | 1 | 2 |
From these examples, give an algorithm for sorting an array given that you have a frequency map of its elements.
Part B: Counting Sort
Write a static function void countingSort(int range, int[] arr) that takes two arguments, an array arr whose elements range from 0 to range, exclusive, and sorts the elements of arr.
(Hint: what is missing from your algorithm your derived in the previous part?)
Part C: Analysis
Suppose that you have an array of size that contains elements in the range to , exclusive. Give both the time and space complexity of counting sort.
Based on your analysis, what do you believe are the pros and cons to counting sort? Check with a member of the course staff before completing this part!
Loot generator
Procedural content generation in the context of video games is the process of generating content such as levels, art, or other assets “on the fly” rather than up-front. For example, instead of designing a series of levels for a game, we may instead provide several level primitives and then write a series of rules as to how these primitives can be combined to form actual levels. Then we can write a series of procedures or methods that automatically combine primitives according to the rules to form complete levels.
Many video games have used procedural content generation to great effect. One of those games is the venerable Diablo series of which Diablo IV released in 2023 is the latest iteration. Diablo is a Hack and Slash role-playing game that focuses on leveling up and getting loot for your character by killing monsters. The appeal of Diablo is that both the levels and loot are procedurally generated so that players are incentivized to replay the game in order to make their characters stronger. Many games have emulated Diablo procedural design, in particular, the action role-playing game Torchlight and the first-person shooter/role-playing mash-up Borderlands.
In this homework, we’ll be implementing the loot generation algorithm found in Diablo II. Since Diablo II has been around for over a decade, dedicated fans have put together exactly how the game procedural generates loot as detailed on the Diablo Wiki. For our purposes, the loot generation algorithm is interesting because the algorithm uses mapping data structures coupled with recursion in a novel way.
The algorithm and data files we use are simplified versions taken from the above article. However, the core ideas remain the same, so you can have faith that after this assignment, you’ll understand how Diablo II generates items!
Code
The starter code for this project is minimal since you’ll be tasked with designing the appropriate support classes for this project!
You should place LootGenerator.java in the edu.ttap.lootgenerator package along with any additional sources files you create.
Additionally, we provide a collection of data files curated from the actual Diablo II data files for testing purposes.
After unzipping the archive, you should place the folder data/ into the root of your project directory.
The loot generation algorithm
Diablo II uses a collection of files in order to randomly generate loot. For this homework, we’ll be providing you two sets of these files to power your loot generator. All the files are tab-delimited text files, so you can open them up either in VSCode or a spreadsheet program such as Excel or Google Sheets. In the sections that follow, we’ll describe the contents of each of the files, but you should look at these text files yourselves in order to get a sense of the layout.
To generate a single piece of loot, our LootGenerator program will go through the following steps:
- We randomly pick a monster to fight. For the purposes of this program, we won’t simulate combat; we’ll instantly kill the monster!
- We look up the treasure class of that particular monster and using that treasure class, generate the base item that is dropped by the monster.
- We generate the base stats for the generated base item.
- We generate affixes (i.e., prefixes and suffixes) for the item and stat modifiers from those affixes.
Step 1: Picking the monster
The data file monstats.txt contains the list of possible monsters in the game. It has the following format:
Class Type Level TreasureClass
The class of the monster is its name. The type and level are irrelevant for our purposes, and the treasure class defines the class of items that the monster drops when it dies. In the next step, we’ll look up this treasure class in another file to determine the item the monster drops.
You should choose a random monster from this file to slay using the Random class.
Each monster has an equal probability of being chosen.
Step 2: Looking up the treasure class
Once we’ve picked a monster and extracted its treasure class (TC), we next go to TreasureClassEx.txt to determine the base item that the monster drops. A base item in Diablo II is an armor or weapon type that we’ll build upon to generate a final item. For this assignment, we will only generate armor pieces. Adding weapons is a potential way for you to improve your assignment as outlined below.
TreasureClassEx.txt has the following format:
Treasure Class Item1 Item2 Item3
Each treasure class entry in this file describes three possible drops that can occur for that TC. For example, here is one line of the TreasureClassEx.txt from the simple data set.
Act 5 (H) Equip B armo60b armo60b Act 5 (H) Equip A
A TC is defined to be a string that has an entry in this file.
So the Act 5 (H) Equip B TC has three possible drops which are themselves TCs (because armo60b and Act 5 (H) Equip A also appear as treasure classes in the file).
Note that armo60b appears as two of the three possible drops for Act 5 (H) Equip B which means it has 2/3rds of a chance of being picked.
Here is another line from the simple data set:
armor60a Embossed Plate Sun Spirit Fury Visor
The armor60a TC has three possible drops that are all base items because they do not appear as TCs in the file.
To determine the drop that actually occurs from a monster, we go through the following process.
- We look up the monster’s TC in TreasureClassEx.txt.
- For that TC, we randomly choose one of three drops listed in the file.
- If the drop we choose is a TC, we look up that new TC in the file and randomly choose from one of its drops. We repeat this process until we finally arrive at a base item.
- The base item that we finally choose is the randomly generated drop from our monster!
Step 3: Computing base stats for a base item
Since we are not actually simulating any combat mechanics, computing the base stats for the base item we generated in the previous part simply means we generate a String that contains the base statistic for that base item. For armor pieces, the base statistic is defense and should be printed out in the following form:
Defense: <defense value>
The defense value is derived from the entry for the base item in armor.txt which has the following form.
name minac maxac
This defense value for armor is simply a random integer in the range minac to maxac inclusive.
You will need to generate such a random integer to create the base statistic string.
Part 4: Generating affixes
Finally, we generate a prefix and suffix for our item. A prefix and suffix each have a 1/2 chance of being generated. So our item generator may make an item with both a prefix or suffix, one of a prefix or suffix, or neither a prefix nor a suffix.
Prefixes and suffixes exist in the MagicPrefix.txt and MagicSuffix.txt files respectively and have the following identical formats:
Name mod1code mod1min mod1max
Name is precisely the prefix and suffix that you will attach onto the base item’s name. mod1code is the additional statistic text that the affix will introduce to the base item. That statistic will have a single, random integer value in the range mod1min and mod2max inclusive.
Thus, the format of the final item name will be:
<prefix (if it exists)> <base item name> <suffix (if it exists)>
The format of the additional statistics from the prefix and suffix have the form:
<value> <statistic text>
Each additional statistic should be printed on a separate line with the prefix statistic coming before the suffix statistic. If a prefix or suffix is not generated, then you should not include an extra line for that prefix or suffix.
Format of the output
In your LootGenerator program, you will repeatedly play a number of “rounds” until the user is finished. Each “round” of the loot generator has you squaring off against a randomly-chosen monster, killing it, and then displaying its loot. The format of your output for each round should look as follows:
Fighting <monster name>...
You have slain <monster name>!
<monster name> dropped:

<complete item name>
<base item statistic>
<additional affix statistics>
Afterward, you should prompt the user to see if they wish to fight again:
Fight again [y/n]? <echoed user input from Scanner>
The prompt should be “generous” in that it is case-insensitive (i.e., “y”, “n”, “Y”, and “N” are all valid responses) and re-prompts the user if they do not enter a valid value. The re-prompt message is the same as the original prompt message.
Data sets
The set of files armor.txt, MagicPrefix.txt, MagicSuffix.txt, monstats.txt, TreasureClassEx.txt, and weapons.txt comprise a single data set for your program.
We provide two data sets for testing purposes, found in data.zip archive.
-
The small dataset found in
data/small/consists of a single monster, 6 treasure classes, 9 armor pieces, and 5 affixes. A common technique is to test your program on a toy data set. This toy data set is small enough for you to easily reason about how your program deals with the data. You should start out with this data set and make sure that your program works with it. -
The large dataset found in
data/large/includes 49 monsters, 68 treasure classes, 202 armor pieces, and 758 affixes. Once you have your program working on the small data set, you can move onto the large data set to further test your code.
One testing technique you may want to try is to temporarily remove the prompt for your code when you use the large dataset, so that the program rapidly generates new items. If your program can do this for an extended period of time without throwing an exception, then you can have increased confidence that your program works correctly.
Example of item generation
To tie everything together, here is an example of generating an item from the small data set. While you read through this example, you should follow along with the data files above.
- Pick a random monster: there is only one monster in monstats.txt, hell bovine, so we pick it.
- Get the TC for that monster: we look back in monstats.txt and find that the TC for hell bovine is Cow (H), the fourth entry on the line.
- Generate the base item: going to TreasureClassEx.txt, we look at the entry for Cow (H) and randomly pick one of the three items on that line. Let’s say we end up picking armo3. This is a treasure class (because it has an entry in the TreasureClassEx.txt file), so we look at the entry for armo3 and randomly pick again. Let’s say we end up picking Leather Armor which is not a treasure class, so we generate it as our base item.
- Generate base stats: We scan armor.txt for a Leather Armor entry. As per the instructions, we randomly choose a number between the values minac and maxac inclusive which we find is 14 and 17 for Leather Armor. Say we choose the value 15, so the base statistic for our item is “Defense: 15”.
- Generate affixes and affix stats: finally we need to generate the affixes for our item. Let’s say that we end up only generating a suffix for our item. We go to MagicSuffix.txt and randomly choose one of the entries, for example, say we pick “of the Titan” that has entries “Strength”, “16”, and “20” for mod1code, mod1min, and mod1max respectively. Let’s say that we pick 18 as our statistic value, a random number between 16 and 20 inclusive. Then our affix statistic is the string “18 Strength”.
Putting this together, our output for the round should look like:
Fighting Hell Bovine
You have slain Hell Bovine!
Hell bovine dropped:

Leather Armor of the Titan
Defense: 15
18 Strength
Program Design
We recommend proceeding in two steps for this homework:
- Create supporting data structures and associated classes.
- Implement the loot generation algorithm using this structures and classes.
Supporting Data Structures and Parsing
All the data contained in the files can be represented in our program using lists or maps.
Feel free to use the implementations of the List and Map interfaces found in the Java standard library—ArrayList, LinkedList, HashMap, and TreeMap.
You should write functions to parse out each of the files and store the data in one of the data structures.
What operations you need to perform on the data (iteration and random access versus lookup) will dictate what structure you should use for a given file.
Furthermore, each of the files contains its own sort of data, one entry per line.
You should hold each of these lines of data in a structured format by creating a class that holds each of the fields contained in a line.
For example, for monstats.txt, you would create a class called Monster that holds the class, level, type, and treasure class of a monster declared in the file.
Parsing each of these files amounts to creating a data structure that contains instances of each entry class that you design.
To structure your code appropriately, you should have a method for each of the files that parses that file and produces an appropriate data structure containing the data found in the file.
Regarding data structures, for a given file, you can either store the different entries in a list or a map. Consider how you access the entries as a guide to which structure you should choose. If you are trying to access a particular entry “by key,” then a map makes more sense. Otherwise, if you are simply reaching into the entries like a bag, then a list makes more sense.
Implementing the Algorithm
With the data structures in place, implementing the algorithm becomes easier. In a file called LootGenerator.java, you should have one helper method that does the work of performing each of the steps of the algorithm described above, i.e.,
pickMonster(...)fetchTreasureClass(...)generateBaseItem(...)generateBaseStats(...)generateAffix(...)
Your helper methods may call out to other helper methods of your design to factor out the code further. The arguments to these methods are up to you to design—follow the walkthrough closely above to get a sense of what the inputs and outputs are to each step of the algorithm.
Your main method should put all of these method calls together to create an item.
Keep in mind that you need to repeatedly prompt the user to generate additional items until they indicate they are done with the program.
Rainbow Tables
Imagine a server that authenticates user passwords. Such a server would need to store a mapping from usernames to passwords so that it can determine whether a given username/password combination is valid. However, storing these passwords as-is on the server is a disaster waiting to happen! If someone hacks such a server, then they would have access to everyone’s passwords, and because people frequently use the same username/password combination, such an unscrupulous actor would be able to log into many other critical sites, e.g., an email account, for such a user.
To mitigate such a scenario, servers will typically not store passwords in plaintext. Instead, they store a hash of the password using a cryptographic hash function, a hash function with the additional property that it is hard to invert, i.e., given a hash, it is computationally difficult to discover the original password (even if a malicious attack knows what the hash function is). The server can then store mappings from usernames to hashes so that a data breach doesn’t disclose users’ passwords.
Password Chains
Now, let’s put on our black hats for a bit! Suppose that we breached a server and obtained a collection of username-hash pairs. The hashes are useless as-is; we need to recover the passwords from these hashes! How might we defeat such a scheme?
In an ultra ideal world, we could compute for each possible password its corresponding hash. We can then store this information in a reverse lookup table: a database of hash-password pairs. However, this is too much information to store! For example, if passwords were restricted to be exactly 12 characters in length and only consisted of lowercase alphabetical characters, there would be —96 quadrillion—entries to store in such a database. If we allow for more variety in password length or characters, that number balloons further!
How can we get away with storing less information?
Let’s assume we know the hash function H and let’s consider starting with a password, say balloon.
Suppose the hash function sends balloon to the hash value (written in hexadecimal notation) so we have:
balloon --H--> 0x03f0ad
Now let’s suppose we had an additional function R, called a reducer function.
This function takes a hash value and produces a password.
Note that this function does not (necessarily) invert the original hash function as that is supposed to be difficult!
R is any function that produces a potential password from a hash, likely completely unrelated to the original password.
Let’s say that R takes our current hash 0x03f0ad and produces the new password, hotdog:
balloon --H--> 0x03f0ad --R--> hotdog
We can now repeat the process, using H to create a hash from the new password and R to create another password from that hash.
Iterating this process a fixed number of times produces a chain of passwords and hashes, eventually end-pointed by a password.
balloon --H--> 0x03f0ad --R--> hotdog --H--> 0x11afde --R--> cattail --H--> ... --R--> guitar
Note that this process is deterministic: given the initial password, H, and R, we can produce the end password in the chain.
Therefore, to save space, we only need to store the initial and ending password to “capture” this chain!
In this case, we would store the mapping (balloon, guitar) in our database.
Using Password Chains to Discover Passwords
Given a collection of these chains, a hash function H, reduction function R, and a hash h, how can we use the chains to discover the password associated with h?
Suppose that the hash we are given is 0x11afde.
We can use H and R to recreate a password-chain starting at this hash:
0x11afde --R--> cattail --H--> ... --R--> guitar
For each generated password, we can see if it is the endpoint of a chain.
For example, the chain starting with hash 0x11afde eventually produces guitar which is a known endpoint of a chain.
Once we discover such an endpoint, we can go back to the start of the chain (balloon) and recreate the chain until we encounter the hash again.
balloon --H--> 0x03f0ad --R--> hotdog -->H--> 0x11afde
The password for 0x11afde is hotdog, the password that preceded it in the chain!
The Rainbow Table data structure
A rainbow table consists of a hash function, reduction function, and the collection of chains. Given a hash, we can use the rainbow table to lookup up its corresponding password via the process described above.
Setup
As per usual, create a new lab repository for this week using our template for Maven-based Java projects.
You should use this template repository to create a new repository on your account, giving the repo an appropriate name for this week’s work, e.g., security.
Once you have created and locally cloned your repository, add the following files, taking care to ensure that you add them to folders consistent with their declared packages, edu.ttap.rainbowtable.
Hash, Password, and Pair are all simple records declarations so that we get the benefits of free hashCode implementations!
While Hash and Password are both Strings underneath the hood, we use different class types so that we don’t mix them up in our code.
The RainbowTable class
You should implement the two stubs in RainbowTable.java according to the description of RainbowTable above:
- The constructor for RainbowTable takes a list of chains (pairs of passwords that are endpoints of the chain) along with a hashing and reducing function as input.
Optional<Password> invert(Hash h, int maxSteps)attempts to find the password that generateshby performing up tomaxStepshash-reduce cycles.
Think through the hash-inversion process and think about what data you need in invert in order to perform the operation.
Working backwards, this data ought to be defined as fields of the RainbowTable class and those fields should be loaded in the constructor.
In our implementation, we’ll use two types from the standard library that require a bit of explanation:
- The
Function<T, U>interface describes functions that take aTas input and produce aUas input. We can produce such a function from a lambda, e.g.,(Integer x) -> x.toString()has typeFunction<Integer, String>. Alternatively, if astaticfunction has the correct type, we can also use method reference syntax::, e.g.,Integer::toString()also has typeFunction<Integer, String>. TheFunctioninterface provides a methodapply(T value)that allows us to call the function. - The
Optional<T>generic class is a box that can holds a single value of typeT. We construct such a box with a value using theOptional.ofstatic method, and we construct an empty box with theOptional.empty()static method.
To test your implementation, we’ve provided a codified version of the reading’s example in the following test file.
This file should be placed in the edu.ttap.rainbowtable package of the test directory (src/test/java/...).
Exploring Graphs
Our final family of data structures, graphs, is a rich family with many applications. You’ll study graph algorithms extensively your (equivalent of) discrete mathematics and algorithms classes. For now, we’ll gain practice working with graphs in a computer program by implementing a basic graph data structures and fundamental operations over graphs.
In particular, in this lab, we’ll practice translating graph algorithms to code, a common practice in practical programming scenarios. It is important to be able to derive these algorithms on your own, a topic of subsequent courses. However, very often, you will be tasked with a problem, and if you can frame it as a graph problem, you can then find the relevant algorithm, e.g., online, and translate it to your particular context.
Setup
Add the following files, taking care to ensure that you add them to folders consistent with their declared packages, edu.ttap.graphs.
Part 1: The Graph Data Structure
First, let’s implement the basic data structure as we discussed in class. Specifically, we’ll implement a weighted, undirected graph although not all of our algorithms will require the weight.
Because real-world graphs typically contain many (at least hundreds of nodes, if not more), it behooves us to assume that the data for our graphs will come from files. Let’s assume that our graphs are specified in text files, where each line of the graph records an edge of the graph:
<node A> <node B> <weight>
For example, the line A B 10 says that there is an edge in the graph from node A to B with weight 10.
A good design pattern to follow is to factor out the file-reading code from the data structure itself.
To do so, we’ll use the GraphEntry class to capture the data found on a line.
We can then construct a graph from a list of these entries where, e.g., our main method would then read from a data file, create said list of entries, and feed that to the Graph constructor.
With this in mind, implementing the constructor for Graph using an adjacency list representation of graphs.
Recall that an adjacency list is a map from a node (represented as a string in our program) to a list of nodes.
An entry in this list denotes an edge from the first node to the second.
public Graph(List<GraphEntry> data)
Since our graph is undirected, we can traverse an edge from either of its vertices to the other. Because of this, it’ll likely be useful to record that fact that for edge that is adjacent to and is adjacent to in your adjacency list.
Since our graph is weighted, we will also need to record more information than just the edges!
Consider what additional fields you need for your Graph class to easily implement the following methods:
public boolean contains(Node node)public Optional<Integer> weight(Node src, Node dst)
Implement these methods so that they take constant time () by adding additional fields to your class that you, then, initialize in the constructor.
Interlude: An Example Graph and Basic Testing
At the end of this lab, we’ll provide a number of sample files for you to try out your graph implementations. Below, here is an example graph that we’ll use in our explanation of the algorithms you implement.
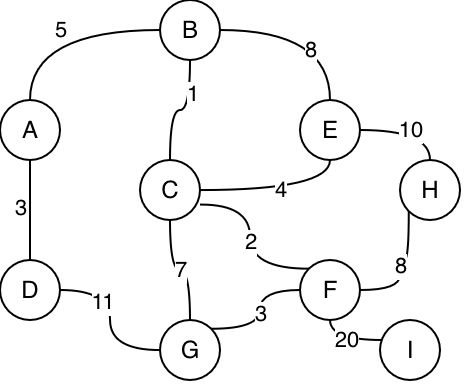
Additionally, we’ve provided this graph as a data file that you should place in a top-level /data directory in your project:
As well as a simple test file utilizing that data file
Note that this test file exists in the edu.ttap.graphs package, so it should appear in a relevant subdirectory of /src/test/java/... of your project.
Part 2: Depth-first Search
Previously, we learned about the various versions of depth-first search we could perform over trees. Since trees are a special case of graphs (a tree is a graph with no cycles), we can also perform depth-first search over graphs!
Recall that in a depth-first traversal, we intermix “processing” the current node, e.g., printing its value, and recursively exploring its children. For example, in our example graph, if we begin a pre-order depth-first traversal starting at , we might process the nodes in the following order:
Observe in this traversal how we eventually reach and then backtrack to to explore a different edge that brings us to . Similarly, we backtrack after reaching to in order to end at .
The order in which we explore the children matters, so another pre-order depth-first traversal might yield:
Where we, instead, go down the -side of the graph rather than the -side first.
Implementation
Since graphs may have cycles, using recursion makes less sense because naively navigating into a cycle will cause us to go into an infinite loop. Subsequently, we tend to implement algorithms like depth-first search over graphs using iterative rather than recursive means. To perform depth-first traversal over a graph, we employ a stack to emulate the order in which our would-be recursive calls would have processed the nodes of the graph:
- Create an empty stack and push the starting node onto the stack.
- While the stack is not empty:
- Pop the top node off the stack.
- If the node is not already visited:
- Process the node and mark it as visited.
- Push all the nodes incident to this one (i.e., connected by an edge) onto the stack.
Implement depth-first traversal in the Graph class by adding the following method:
List<String> collectDepthFirst(Node start): returns a list of the nodes obtained via a depth-first traversal of the graph starting with the given node.
Note that the marking scheme is necessary to ensure we do not go into an infinite loop. To implement this marking scheme, we recommend maintaining a local data structure during the traversal process that allows you to lookup whether a node has been marked.
Part 3: Breadth-first Search
Once we make iterative the depth-first search process, you might have noticed another way to extend the search! Recall that a stack is a first-in-last-out (FILO) data structure. A queue on the other hand is a first-in-first-out (FIFO) data structure. What happens when we replace the stack with a queue in our search?
We obtain a new kind of search, a breadth-first search. By “breadth,” we mean that we’ll explore the graph by levels rather than diving as deeply as possible and back-tracking. We’ll discover all the nodes that are 1 edge away from the start node, then 2 edges, 3 edges, and so forth.
On our example graph, a breadth-first traversal explores nodes in the following order:
Observe how:
- and are 1 edge away from .
- , , are 2 edges away from .
- and are 3 edges away from .
- is 4 edges away from .
Like our depth-first search, the order of visiting children is arbitrary, so we may intermix nodes within each of these buckets, but we’ll always explore all the distance 1 nodes before the distance 2 nodes, distance 2 before distance 3, and so forth.
Implementation
The implementation of breadth-first search is identical to depth-first search save for the replacement of the stack with the queue.
- Create an empty queue and push the starting node onto the queue.
- While the queue is not empty:
- Dequeue the top node off the stack.
- If the node is not already visited:
- Process the node and mark it as visited.
- Enqueue all the nodes incident to this one (i.e., connected by an edge) onto the queue.
Implement breadth-first traversal in the Graph class by adding the following method:
List<String> collectBreadthFirst(Node start): returns a list of the nodes obtained via a depth-first traversal of the graph starting with the given node.
Part 4: Minimum Spanning Trees
Finally, let’s implement a basic graph algorithm to get a flavor of what working with graphs is like. Consider identifying a minimal subset of the edges of a graph that connects all the nodes together, i.e., spans the vertices. If this subset is minimal in terms of edges, we can observe from graph theory such a subset must contain edges where is the number of vertices. Such a subset of the graph is a called a tree, thus we call it a spanning tree of the graph. For example the following is a spanning tree of the graph (the dotted edges are not part of the spanning tree) since it is a tree where every node is reachable
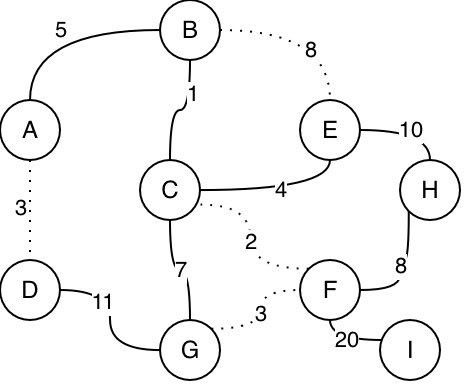
There are potentially many ways to create a spanning tree for a graph. In the case where the graph has weighted edges, we would like to further minimize the total weight of such a tree, i.e., the sum of the weights of its edges. Below is the minimum spanning tree for the example graph.
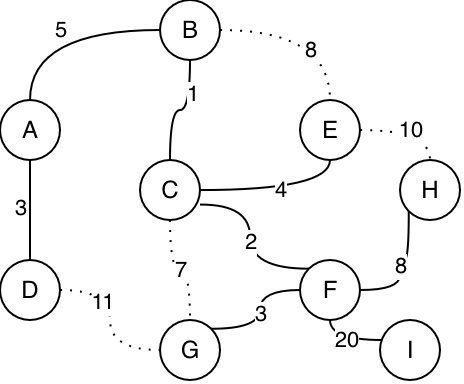
Implementation
Unlike depth- and breadth-first searches, deriving the minimum spanning tree for an undirected, weighted graph requires some care. One of the fundamental algorithms for deriving a minimum spanning tree is Prim’s algorithm. To find the minimum spanning tree of a graph beginning at some starting vertex:
- Create three collection:
- The vertices visited so far, initially empty.
- The edges visited so far, initial empty.
- A mapping from each vertex in the graph to the minimum weight edge from the vertices visited so far to . Initially, there are no such mappings in the graph.
- Beginning with the start vertex:
- Add the start vertex to the visited collection.
- Update the vertex-edge mapping with the start vertex:
- For each vertex incident to the start vertex, add a binding from that vertex to the edge connecting it and the start vertex to the map.
- While there is a vertex that does not appear in the visited collection:
- Choose an unvisited vertex in the mapping whose corresponding edge has minimum weight among all the unvisited vertices. Add that edge to the visited edge collection.
- Add to the visited collection.
- Update the vertex-edge mapping with :
- For each vertex incident to , add/update the binding with the edge if it does not exist yet or is smaller than the current edge for .
This algorithm is decidedly more complicated than our traversal algorithms! I recommend that you first trace through the algorithm on the example graph and observe how we eventually derive the minimum spanning tree given above.
Implement this algorithm in the following method of the Graph class:
public List<Edge> deriveMST(String start): returns a MST of the given graph starting at the given node as a list of edges.
Additionally, put some care into the data structures you choose for the three collections that the algorithm maintains. What data structures efficiently implement the operations required of that structure by the algorithm?
Part 5: Applying Graph Algorithms
Finally, with some basic graph algorithms defined, let’s employ them to solve a variety of tasks! The beauty of graphs is that they are applicable to many situations. Below, you’ll find a link to a data set you can use for this exploration:
Look at the data set and infer from the content what it is about.
And for each of the algorithms we’ve implemented—DFS, BFS, and Prim’s algorithm—describe in a comment in Graph.java:
- What kind of question could each algorithm answer of this data set?
- The answer to the question you posed, obtained by applying the algorithm to the data set.
Spellchecker
For this lab, copy the following files to a new lab project created from our template:
Make sure to create a new repository on your account from this template (instead of merely cloning the template repo), giving your new repo an appropriate name for this week’s work, e.g., adv.
Add the following files to the project, making sure to put data files in the files directory and source files in their proper sub-folders under src based on their package names:
- words_alpha.txt
- SpellChecker.java (
edu.ttap.spellchecker)
Part 1: Try Out Tries
First, let’s check our understanding of the Trie data structure by building a Trie by-hand for the following set of words.
Simulate how the add operation of the Trie will work by adding each word in sequence to an initially empty Trie.
Draw this Trie on a whiteboard or piece of paper for future use!
- dog
- doge
- dogma
- doggo
- dogy
- dig
- digit
- dign
- dega
- degas
- degum
- degs
In your diagram, make sure to be explicit where individual characters and whole words “exist” in the structure.
Part 2: Representation
Now that you’ve walked through the creation of a Trie, implement the following members of SpellChecker:
- The
Nodeclass. void add(String word): addswordto the trie.SpellChecker(List<String> words): creates a new spell checker with the given set of words.
You will likely find your implementation straightforward if a node represents a position between characters in a word and the edges between nodes represent characters.
Part 3: Basic Spellchecking
For the remainder of this lab, we’ll follow the pattern set up in the previous parts.
- We’ll use our running paper example to explore how we might implement a spell-checking operations.
- We’ll then implement the corresponding method in the project.
First, let’s use our trie to check whether a word is spelled correctly.
Use your paper trie to trace through how you would check whether the following words are in the set:
- doggo
- digy
- dog
From this, implement boolean isWord(String word) that checks whether the given word is in the SpellChecker’s trie.
Once you have implemented this method, you can run the check command of the SpellChecker program.
Augment your project to call SpellChecker’s main method from the top-level Main clas sof the program.
Afterward, you can run the program at the terminal as follows:
$> mvn compile exec:java -Dexec.args="check doggo"
Check out the main method in SpellChecker to see how everything is wired together.
The SpellChecker programs pulls its dictionary from a comprehensive list of English words found at the following Github repository:
The dictionary file, words-alpha.txt is linked above and should be included in the files subdirectory of your project.
Feel free to inspect it to determine what inputs to feed to your program to test its functionality!
Part 4: Autocompletion
Next, let’s move beyond checking into offering suggestions to the user. The first kind of suggestion we’ll consider is autocompleting a word. For simplicity’s sake, we’ll constrain ourselves to autocompleting a word by adding a single character onto the end. However, once you implement this process, you can likely see how you might generalize this to capture any n-character completion of a given word.
Use your example trie and imagine how we might determine the one-character completions of the following word prefixes:
- deg
- dog
Once you have completed this, feel free to implement List<String> getOneCharCompletions(String word) which gives all the one-character completions of word found in the dictionary.
Part 5: Simple Suggestions
Autocompletion, is perhaps, a bit forward-thinking. Really, when we think of spell checking, we think not only of being told if a word is misspelled, but also what are likely suggestions for fixing the misspelling! To begin, let’s consider making autocorrection suggestions for spelling errors that arise because the last letter of the word is wrong.
Imagine we are given the following word, digy.
Trace through how you would navigate the trie to discover all possible suggestions to correct this misspelling by replacing the last character ‘y’ of the word.
With this in mind, implement List<String> getOneCharEndCorrections(String word) which gives all possible autocorrects of word that come about by replacing the last character of word with a new character.
Optional addition: One-letter Errors
In the previous part, you only considered errors and subsequent fixes that arise by fixing the last letter of the word.
Generalize this procedure to consider corrections that arise by fixing any one letter found in the word.
Consequently, implement List<String> getOneCharCorrections(String word) and change the correct command to use this function!
Additional Extensions
In this lab, we’ve considered basic spellchecking functionality, but there are many additional features to add!
- How might we handle multi-character corrections?
- How might we prioritize different corrections, e.g., by number of edits or common errors?
- How might we filter/include/exclude word extensions, e.g., pluralization?
Malicious URL Detector
Recall that when detecting malicious URLs, we need to optimize both lookup speed and storage. There are potentially millions of known-to-be-malicious URLs we need to index, making conventional storage in, say, a hash set, impractical. Furthermore, in this context, we can tolerate false positives, situations where a good URL is considered malicious, but we certainly do not want false negatives, situations where a malicious URL is considered good!
Setup
For this lab, copy the following files to a new lab project created from our template:
Add the following files to the project, making sure to put data files in the files directory and source files in their proper sub-folders under src based on their package names:
The data file, malicious_phish.csv, should be placed in the /data directory of the project.
The source files should be placed in folders that reflect their declared package: edu.ttap.bloom.
Part 1: The Bloom Filter
The Bloom Filter is an advanced mapping data structures that meets all these criteria! A Bloom filter over values of type consists of:
- An array of booleans of some fixed size . Such an array is typically implemented efficiency as a Bit Set, a data structure that maintains precisley one bit per boolean.
- A collection of hash functions of type .
With this in mind, implement the constructor of the BloomFilter class which takes a bit set size and list of hash functions and makes a new, empty BloomFilter.
Java provides a direct implementation of BitSet in the java.util package.
Part 2: Addition
Adding an element to a Bloom filter is straightforward:
- To add an element to a Bloom filter, we run through each of the hash functions (modulo ) to generate indices into the array of booleans and set those indices to
true.
Note that since we use multiple hash functions, no probing or chaining strategies are necessary, simplifying implementation!
As an example, consider a Bloom filter with a backing bit set of size ten () that contains elements of type with three hash functions , , and . Here is a table of example values of type and the output of the hash functions on each of these values.
| 1 | 3 | 15 | |
| 2 | 14 | 8 | |
| 11 | 4 | 5 |
Imagine beginning with a bit set of 10 bits:
00000 00000
First, simulate execution of first adding and then to the Bloom filter. What is the state of bits after adding each element? Note that it is ok if a bit is already set in the filter! By using multiple hash functions, we use a collection of bits to identify whether an element is in the set, so any single conflict is not a problem.
Check with a member of the course staff to make sure you understand how add works.
And then, use this example to implement the void add(T item) method of the BloomFilter class.
Part 3: Containment
With addition implemented, let’s now consider how we perform membership checking.
- To check to see if an element is in a Bloom filter, we run through each of the hash functions (modulo ) to generate indices into the array of booleans and check to see if all of those indices are true.
Consider the state that we left our Bloom filter in after the previous part. Check to see if , , and are contained in the filter according to the membership checking algorithm. Are these results reasonable given the design goals of the Bloom filter?
Check with a member of the course staff to make sure you under how contains works.
Once you have done that, go ahead and implement the boolean contains(T item) method of the BloomFilter class.
Part 4: Making Hash Functions
With the filter completed, now we need to specialize it to our specific domain of detecting malicious URLs.
URLs are just strings, so we need to instantiate our generic BloomFilter class to String.
The first step of this process is to provide the String-specific hash functions that will power the filter.
Java, of course, provides a single hash function for String via the int hashCode() method.
But the power of the Bloom filter comes precisely from providing an arbitrary number of hash functions to the filter!
We could manually come up with many different hash functions, but this is both time inefficient and problematic if we were to consider data types other than String.
There are two approaches that we might consider to solve this problem:
- Use one hash function to generate a large hash value. We can then divide up the bits to create smaller hash values. For example, we could generate a 256-bit hash and then divide up the hash into four 64-bit hash values.
- We can use a hashing algorithm that is parameterized by a seed value to generate different hash functions for a datatype by choosing different seeds.
We’ll employ this second method, in particular, by using the MurmurHash hashing algorithm which, indeed, allows you to specify hashing functions that differ by a seed value.
Our implementation will go into the static List<Function<String, Integer>> makeStringHashFunctions(int num) method of MaliciousURLDetector.
Rather than implementing MurmurHash by hand, we’ll use the Google Guava libraries, a set of general-purpose library used internally at Google that fill several niches not already covered by Java’s extensive standard library.
To include Guava, include the following <dependency> element within the <dependencies> element of pom.xml.
(Note that the only other dependencies included in the project should be junit-jupiter and jqwik.
<dependency>
    <groupId>com.google.guava</groupId>
    <artifactId>guava</artifactId>
    <version>33.5.0-jre</version>
</dependency>
In particular, the com.google.common.hash package of Guava contains a Hashing.
Hashing contains a static method:
HashFunction murmur3_128(int seed): returns aHashFunctionthat implements the Murmur3 algorithm with the givenseedvalue.
We can use different seed values to produce as many HashFunctions as we would like.
We can obtain these seeds via a random number generator, e.g., using ThreadLocalRandom.current() from the java.util.concurrent package which gives you access to a Random instance without the need to new one up.
Once we have a HashFunction in hand, we can use it to create a lambda of type Function<String, Integer> that generates hash values for Strings.
The following method of HashFunction will be useful for this purpose:
HashCode hashString(String input, Charset charset): generates aHashCodefor the giveninputstring. We can then retrieve the actual hash code from theHashCodeobject using itsasInt()method. Thecharsetargument ofhashStringcan be filled with theCharset.defaultCharset()static method of theCharsetclass found in thejava.nio.charsetpackage.
Recall that the syntax of lambdas in Java is very lightweight: arg -> expr creates a lambda with a single arg that evaluates to the value that expr evaluates to.
Part 5: Populating the Filter
Next, we need to populate the filter with malicious URLs. We’ll use an open dataset of 651,191 URLs by Manu Siddhartha from Kaggle. Once the filter is populated with this dataset, we can check whether a URL is suspected to be malicious by seeing if it is a member of our Bloom filter!
The dataset is already found in the data/malicious_phish.csv file found in the project.
Each line of the file is of the format:
<url>,<type>
Where type is "benign" for non-malicious URLs.
Otherwise, the type classifies the kind of maliciousness, e.g., "phishing".
For our purposes, anything not benign is considered malicious.
Implement this behavior in the static BloomFilter<String> makeURLFilter(...) method of MaliciousURLDetector.
You can either use a Scanner or Files.readAllLines to read the lines of the file and the split(String sep) method of the String class to break up the line into its parts according to the format above.
Part 6: The Malicious URL Detector Program
With all of this infrastructure, we can now put together the overall malicious URL detector program (MaliciousURLDetector).
The program proceeds as follows:
- The program receives the size of the Bloom filter’s bitset (in bits) and the number of hash function as input.
- We create a
BloomFilter<String>populated with the data from the malicious URL dataset. - In a loop, we ask the user for a URL (via a
Scanner), check to see if it is in the filter, and report accordingly. - If the user ever enters
"exit", then we quit.
➜ mvn compile exec:java -Dexec.args="4792530 7"
...
Enter a URL to check (or "exit" to quit):
> cnn.com
✅ The URL is not known to be malicious...
> info-pages.000webhostapp.com
‼️ The URL is possibly malicious...
> cpageconstruction.com
‼️ The URL is possibly malicious...
> exit
...
Picking the size of the filter and the number of hash functions is dependent on the size of the set we intend on maintaining. Assuming that our hash functions are well-distributed, we can precisely choose these parameters based on a target false positive probability.
This calculation is an interesting application of probability towards analyzing algorithmic correctness. For our purposes, we can simply use an online calculator that implements an analysis found on Stack Overflow:
Use the calculator to determine the appropriate parameters for this data set and try your filter out! You should also explore what happens when you use less optimal parameters, e.g., reducing the bitset size substantially.